Tag Archives: Italian

Orecchiette with Sweet Italian Sausage, Broccoli Rabe & Ricotta Salata

Orecchiette with Sweet Italian Sausage, Brocolli Rabe & Ricotta Salata Orecchiette with Sweet Italian Sausage, Brocolli Rabe & Ricotta Salata
Here is another one of my mouth-watering pasta recipes to include in your weekly repertoire. It is a classic southern Italian dish from the Puglia region. Some people use Pecorino Romano cheese and hot Italian sausage. This my variation of  an easy-to-follow recipe and super tasty. If you like spicy food, I recommend using the hot Italian sausage to add some kick to this dish. Let’s have some fun in Gina’s Kitchen.

Serves: 6 -8 Level of difficulty: Easy to medium

Ingredients:

  • 1 lb Orecchiette, pasta shape (little ears)
  • 3 lbs. sweet Italian sausage with fennel, cut up in pieces
  • 1/2 cup olive oil plus more to drizzle
  • 1 bunch of broccoli rabe, (rapini) rough chopped
  • 1/4 cup of garlic, chopped
  •  1/2 -3/4 cup  low-sodium chicken broth
  • Salt to taste
  • Freshly ground pepper to taste
  • 1/2 lb. Ricotta Salata cheese, cubed

    Preparation:

  1. In a medium-sized pot, boil the sausages for about 15 minutes. Drain well. Add 1/4 cup olive oil in same pot, and sear them on each side until they obtain a nice golden brown color. You may have to this in 2 batches. Remove, cut each link  in 2-3 pieces. Set aside.
  2. In the meanwhile, in another pot, bring salted pasta water to boil, and cook according to package directions. 5 minutes prior to cooking time is up, add the broccoli rabe and cook in same water. This will save you time and less cleaning.  Drain well. Drizzle with a little oil to avoid clumping. Set aside.
  3.  In an extra large skillet, on medium-high heat, heat 1/4 cup olive oil, sautee the garlic, deglaze with chicken broth,  cook for 1 minute, add the pasta with the broccoli rabe, sausages, season with salt & pepper, and finish with the cheese. Add more chicken broth if necessary. Lower the heat, stir well to incorporate all the ingredients. Drizzle with olive oil and serve at once.

    Wine pairing suggestions: A chilled Gavi, Pinot Grigio, Verdicchio, or a Riesling if you are using the hot Italian sausage. Always cook with love and your food will love you back!

    Recipe written by Gina Martino Zarcadoolas
    Photos by Gina Martino Zarcadoolas for FoodiewineloverFoodiewinelover
    My Food, Wine, & Travel Lifestyles
    Orecchiette with Sweet Italian Sausage, Brocolli Rabe & Ricotta Salata

Pasta with Pancetta, Peas & Ricotta

Pasta with Pancetta, Peas & Ricotta

Pasta with Pancetta, Peas & Ricotta

This is one of the easiest and most delicious pasta dish you will come across. I assure you, even if you don’t like peas, you will enjoy them  because they are bathing in the pancetta fat. I like to use a short pasta for this recipe. The last time I made this dish, I used a pasta shape called Fusilli that looks like a corkscrew. I sent my son shopping for me, and he told me he could not find the Fusilli but found Rotini instead. They are very similar in shape and look like corkscrews, except the Rotini is shorter.  Recently, a Facebook friend posted this dish on his profile, and it looked delicious. I tried it for Christmas, and it was a big hit. I made it again In January for my family. Sadly, this was the last time my dad was able to eat (food) my pasta. I will not get into personal details but this recipe has a lot of emotions attached to it. I am hanging on to hope that someday, soon, he will be able to taste my pasta again.  Let’s get cooking! Follow me in Gina’s Kitchen!

Level of difficulty: Easy – Serves: 4-6 as a main meal

Ingredients:

  • 3/4 lb. pancetta, sliced 1/2-inch thick, then chopped
  • 1 tbsp. olive oil, plus more to drizzle
  • 10 oz. frozen peas, thawed
  • 15 oz. ricotta, whole milk
  • 1 lb. Rotini or any short pasta or your choice
  • 1/4 cup pasta water, (save after draining pasta)
  • salt & freshly ground black pepper
  • 1/4 cup of Parmigiano Reggiano (parmesan cheese)

Preparation:

1) In a large stainless-steel skillet, over medium-high heat, heat olive oil, brown the pancetta, for about 10 minutes, (do not over cook,  you don’t want them too crispy) add the peas, continue cooking while stirring for another 10 minutes or so, until you obtain a nice brown color like you see in the picture. At this point, turn the burner on the lowest setting.

2) Simultaneously, In a large pot, bring the pasta water to a boil. Add salt, and cook pasta according to package directions. I always cook mine al dente, meaning to the bite in Italian, (undercooked for 1-2 minutes) that is your choice, but I recommend it. Save some pasta water, and drain.

3) Add pasta to the pancetta and peas, slowly stir in the ricotta, the water, parmesan cheese, black pepper.  Please note, the burner is still on the lowest setting to warm up the ricotta. Stir it just enough to incorporate all the ingredients and remove quickly.  Drizzle with olive oil. Serve immediately while it’s piping hot.

My family had a feast, and my biggest joy in life is seeing them relish my food. This is what fuels me to keep cooking. My life has been hectic, but I am hoping to find more time in the kitchen.

I hope you will try this recipe, and when you do, please share your thoughts with me.

Pasta with Pancetta, Peas & Ricotta

Pasta with Pancetta, Peas & Ricotta

Wine pairing: I recommend a medium to full-bodied red wine with enough acidity to cut though the fattiness of this savory dish. A Chianti, Rosso, Super Tuscan, (and the list goes on) will make a superb pairing. I am not a huge fan of white wine but occasionally, I do enjoy a crisp one with certain meals.

Cook’s note:

1) The use of butter is an option, and you can add it at the end with the ricotta.  It will  make the dish creamier and add richness but it is also added calories. If you are on a low-fat diet, you may want to avoid it altogether and stick to the olive oil. I did not use butter and surprisingly the taste was amazing.

2) Regular bacon can be used instead of pancetta.

This dish is inspired by Timothy Eric DeMarco
This is the ratio and method that I used in my version of the recipe.
Photos by Gina Martino Zarcadoolas for Foodiewinelover

Happy Cooking!

Gina aka Foodiewinelover
cropped-cropped-logofoodiewinelover11.png

HEAVENLY NUTELLA PIZZA

I hope you all had a wonderful holiday season with your loved ones. For me, it was about spending quality time with my family and close friends, and enjoy the deliciousness of life. Not only, did I host Christmas Day dinner, but, I also cooked a Prime Rib dinner for my son’s birthday on New Year’s Day. As you can imagine, I have been busy in the kitchen,  That’s not all,  I also made a very easy and delicious treat, a Nutella Pizza to start 2016 on a sweet note.  If you are like me, and don’t have a knack for baking, this dessert is for you. It’s so easy, a 5-year-old can make it, (with an adult’s supervision.)  I bought freshly made store-bought pizza dough, and Nutella, a scrumptious hazelnut spread with cocoa. It is the star ingredient in this recipe. I use raspberries and hazelnuts as toppings, but you can use any toppings of your choice, just like you would do in a regular pizza.

Servings: 6-8  Level of difficulty: Easy

Ingredients: 

  • 1 lb.  pizza dough*
  •  Flour to sprinkle on cutting board
  • Pam – spray
  • 1 – 13 ounce jar of Nutella
  • Confectioners sugar for garnish*
  • Raspberries, or any fruits of your choice
  • Roasted hazelnuts, or any nuts

    Preparation:

    1) Pre-heat oven to 500 degree F.
    2) In the meanwhile, put dough out to reach room temperature. Sprinkle some flour on a wood board, and use a rolling-pin to roll the dough. Stretch it as if you are making a pizza.
    3) Spray Pam on the bottom of a round 13-inch pizza pan,  place the dough and press it down around the edges. Take a fork, and poke a few holes on pizza to avoid bubbles during baking.4) Place on the middle rack, and bake for exactly 6 minutes, depending on your oven.  To check for doneness, lift the bottom of pizza with a fork or knife, and if it has a nice golden brown color, then it’s done. Remove it, and put it on a board.
    5)  Using a spatula, spread the Nutella all over the pizza while it’s hot.  Sprinkle the sugar, and garnish with fruits and nuts. Cut in triangles like a pizza. It gets a little messy but that’s all part of the fun! There will be lots of finger-licking!

    I love the idea of hazelnuts because that is one of the ingredients in the Nutella, but you can use any other nuts.

    My family told me that I was trying to kill them, in a good way, of course. It was mouth-watering, and devilishly scrumptious.

    Tips: 1) You can make a homemade pizza dough
    2) Serve it at once, while nutella is hot.
    3) Confectioners sugar is the white powder sugar

    WARNING: Highly addicting!

    Wishing all of you, a Happy and Sweet New Year in The Kitchen!


    Updated – 10/27/2016 Dedicated to my beloved dad in heaven.  RIP July 2016

    Nutella Pizza

    Nutella Pizza

    Nutella Pizza

    Nutella Pizza

    Nutella Pizza

    Nutella Pizza

    Gina, Foodiewinelover
    My Food, Wine, & Travel Lifestyles 

    Photo: by Gina for Foodiewinelover
    Recipe: by Gina for Foodiewinelover

Braciole, A Gourmet Italian meat, in Tomato Sauce

It’s the holiday season, and Christmas is literally around the corner. I am hosting Christmas Day, and need to work on a menu, and finish my shopping. This time of the year is overwhelming for me, but there is a joyous feeling in the air, that goes with the madness of the season. I recently made a dish called:  Braciole, pronounced brajole, or brashole, and is the plural for braciola. It is considered a thinly sliced of meat, stuffed with garlic, parsley, and salami or prosciutto. Most grocery stores have it pre-sliced, or you can have the butcher slice it for you. Some people use flank steak, but I always use top round.  In Italy, this dish is called involtini, and the stuffing/filling can vary depending on the region. If you are still wondering what to make for Christmas, or your holiday dinner, this is the perfect and festive dish for you. It is a bit time-consuming, but the good news is, you can make it 1 or 2 days ahead of time. Please keep in mind, some people do not consume red meat, be sure to have chicken, fish and veggies grace your holiday table.

Serves: 9-12 for a seat-down dinner or 10-15 for buffet style dinner, served with other food.  Level of difficulty: Medium-difficult  Time from start to finish: 2.5 – 3 hours, depending how fast you do all your  prepping.

Making Braciole

Making Braciole

Stuffing braciole

Stuffing braciole

Braciole by Foodiewinelover

Braciole by Foodiewinelover

Searing the braciole

Searing the braciole

Braciole in tomato sauce by Foodiewinelover

Braciole in tomato sauce by Foodiewinelover

Braciole paired magically with Barolo

Braciole paired magically with Barolo


Ingredients for the meat:

  • Olive oil for pan frying
  • 3 lbs. top round steak, thinly sliced
  • 1 – 6 oz  jar of peeled garlic, chopped *
  • one large bunch of flat-leave parsley, chopped
  • 1/3 lb. prosciutto, roughly chopped
  • Sea salt
  • Freshly ground pepper *
  • Butcher twine *

    Preparation for the meat:
     

    1) Place the meat on a butcher block, season with salt and pepper to taste. Sprinkle the seasonings lightly, depending on your sodium diet, on both sides of meat. Keep in mind, the prosciutto is salty. I recommend you use less than more. You can always add more later, but if it’s over salted, the food will be ruined.  It’s hard for me to give you measurements, since I use my fingers to sprinkle the seasonings.
    2) Next, with the tip of your fingers, grab some garlic, parsley, and prosciutto, one at a time, and place at the end of the meat, as shown on the picture. Roll it, like a jelly roll, and repeat the same process. You will work an assembly line, and use the butcher twine later.
    3) Once, your meats are rolled up, it’s time to tie them up with the butcher twine, by securing both ends.  There may be some leftovers, garlic, parsley, and prosciutto. Save to use in the sauce.
    4) In a large pot, on medium high heat, heat up olive oil, Sear the meat on both sides to obtain a nice brown color, about 5-7 minutes. Do this in batches, and set aside.

    Ingredients for the sauce:

  • 1-2 tbsp. olive oil, if necessary
  • 1 tbsp. tomato paste
  • 1 container Pomi, chopped tomatoes
  • 1 container Pomi, strained tomatoes
  • 1 large jar of Mids, prepared tomato sauce, meatless*
  • 1/4 cup of water, put in jar and shake it to get all the sauce
  • Salt & pepper to taste
  • pinch of sugar, optional

    Preparation for the sauce:

    Using the same pot, add more oil, if necessary, brown the tomato paste, add all the tomatoes, water, leftover fillings, salt & pepper, sugar, and put the meat in the sauce. Bring to a boil, simmer on low heat for about 2 hours, uncovered, until the meat is tender. Stir occasionally, to make sure the pot doesn’t burn on the bottom.  If you feel the sauce is too thick, add very little water, and continue cooking.

    Pasta
    1) 2 lbs. of Rigatoni, or any pasta shape of your choice.
    2) While the sauce is simmering, bring water to a boil for pasta. Add salt, and cook as per package directions, or al dente, to the bite.
    3) Drain pasta, drizzle with olive and some sauce to prevent clumping. Set aside. The sauce should be done, and the meat tender by this time.
    4)Remove the braciole from the sauce, and use a pair of shears to cut the twines. (You will need some patience, while I was doing this, my guests were having their salad.)  Arrange them in a nice rectangle platter. This presentation is ideal for a seat-down dinner party like I had.  Serve with the pasta. However for a buffet-style, or for a holiday table, slice them, and arrange them on a beautiful platter. It is more decorative, and appealing.

Braciole

Cook’s notes:

1) Some people use toothpicks to secure the meat, but I prefer using the twine.

2) Freshly ground pepper goes so nicely with the meat.

3) If you don’t want to use garlic from the jar, go ahead and use fresh, just allow more time for peeling.  Nothing wrong with fresh ingredients, I actually encourage it, whenever possible.

4) Some recipes add cheese to the filling, but, I prefer grated  Parmigiano Reggiano, (parmesan cheese), on top of the pasta.

5) This recipe yields 9 meat rolls, but, some people shared one. There were leftovers, and, it was even better the next day.

6) For a small dinner gathering, I recommend you ask your guests if they consume meat or shellfish. Let’s not forget about gluten-free pasta for those who cannot have regular pasta. This may create extra work, but if you are having guests, it’s important to accommodate their diet, and ensure they enjoy their meal.

Wine pairing suggestions: My lovely aunt and  cousin were visiting from abroad, I decided to go all out. I paired this delectable dish with a Barolo, the king of Italian wines. The pairing was magical, and everyone was pleased with my culinary creation. You can also pair this dish with a Malbec or Cabernet Sauvignon of your choice. You want a big wine to stand up to the meat.

Buon Appetito!

Recipe by Gina for Foodiewinelover
Images by Gina for Foodiewinelover
Wine pairing suggestions by Gina for Foodiewinelover

This will probably be my last post before Christmas, therefore, I would like to wish all of you, a happy holiday season, and a Merry Christmas from my home to yours.

In closing, I would like to share this quote: “Christmas! The very word brings joy to our hearts. No matter how we may dread the rush, the long Christmas lists for gifts and cards to be bought and given–when Christmas Day comes there is still the same warm feeling we had as children, the same warmth that enfolds our hearts and our homes.”

Gina, Foodiewinelover
My Food, Wine & Travel Lifestyles
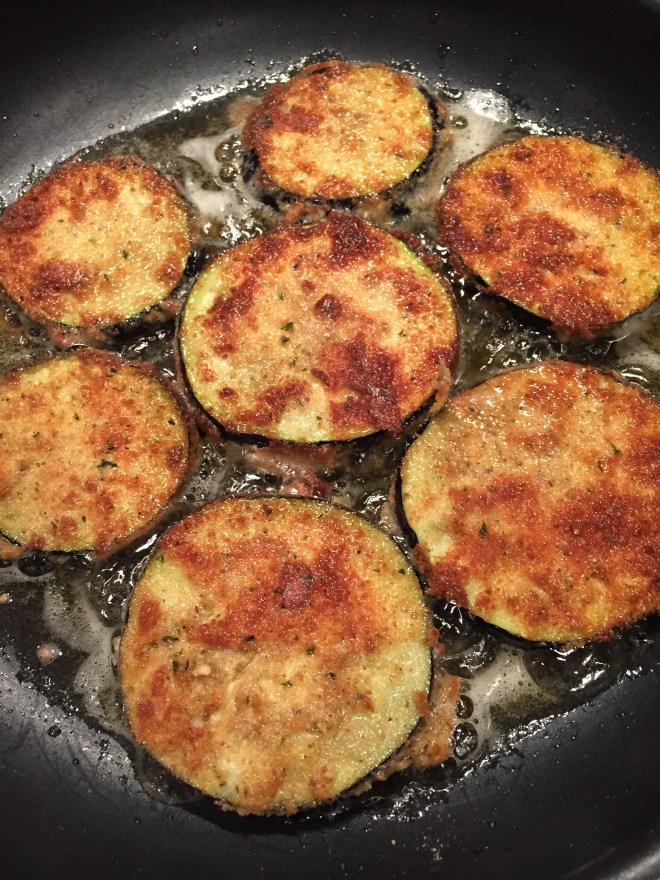
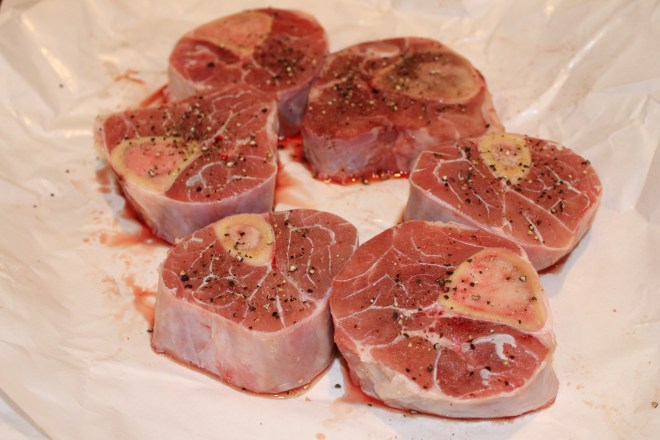
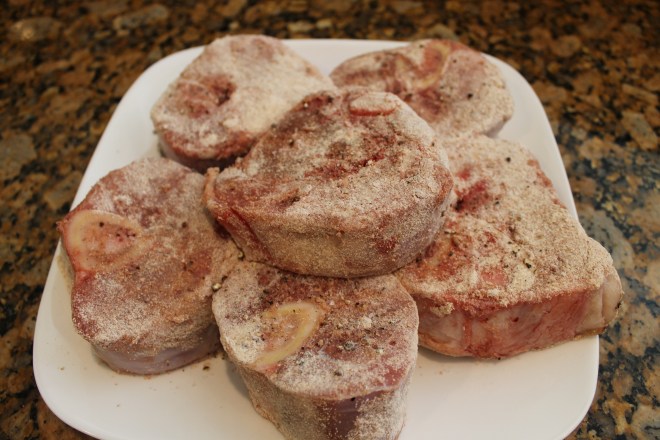
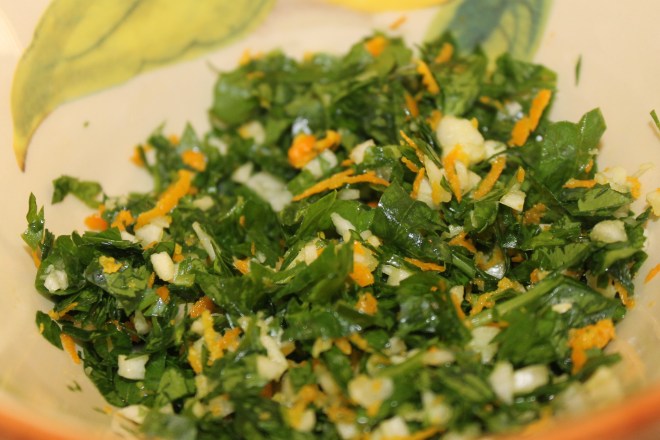


Rustic Style Pasta with Veal, Porcini Mushrooms and Spinach

This flavorful dish is inspired by the mountainous region of Abruzzo, where you will find an abundance of porcini mushrooms. The original recipe was developed by an Italian chef but I put my own spin on it and tweaked the measurements. I have followed his method, and prepared it many times in my kitchen. He recommends using Farfalle, a pasta shape, commonly known as bow-ties, but it literally means “butterflies” in Italian.  You can also use Fusilli, a short pasta shaped like a corkscrew. They both work well, and absorb the sauce nicely.  It’s always a big hit in my kitchen, and perfect for feeding a small crowd.  This recipe brilliantly combines veal, beef, and pork, tomato paste, and porcini mushrooms to create a culinary masterpiece. Make sure you caramelize the tomato paste to get a rust color, and the result will be a stupendous rustic dish packed with layers of deep flavors. Make it for a dinner party, and your guests will think that the sauce has simmered for hours.

Serves 8 to 10 as a first course, 6 as a main
Level of difficulty – medium

Ingredients: 

6 ounces dried porcini mushrooms, soaked in 2 cups hot water for 10 minutes

¼ cup extra virgin olive oil

4 garlic cloves, thinly sliced

2- 2.5 pounds ground veal, beef, and pork divided equally

Salt and freshly ground black pepper

1/2 cup tomato paste

1 cup dry white wine

1 cup plain tomato sauce

14 oz. whole San Marzano tomatoes, crushed by hand

1/4- 1/2 cup reserve pasta water

1 pound farfalle pasta

1 handful of salt for the pasta water

6-8 ounces baby spinach, trimmed

½ cup freshly grated Pecorino Romano

Preparation: 

1. Drain the porcini, reserving the soaking liquid, and coarsely chop the porcini. Strain the soaking liquid through a strainer, and set it aside.

2. In a large skillet, heat the olive oil over medium-high heat. Add the garlic and cook until it is lightly toasted. Add all the meat and the chopped porcini, and cook, stirring, over medium-high heat until the meat is well browned, about 10 minutes. Season with salt and pepper to taste, and add the tomato paste. Cook over high heat, stirring constantly, until the paste turns a rust color, 5 minutes. Add the wine and the strained porcini soaking liquid, and cook for 5 minutes, until the wine has almost completely evaporated. Add the tomato sauce and crushed tomatoes. Reduce the heat to a very low simmer.

3. Bring pasta water to a boil. Add salt. Cook according to package directions or al dente. Drain, and add  the reserve water into the meat mixture. Stir in the baby spinach and mix well until the pasta is nicely coated. Pour into a serving bowl and serve at once, with the grated Pecorino on the side.

My wine suggestion: Montepulciano d’Abruzzo, a delightful red wine from the Abruzzo region of Italy.

Rustic Style Pasta with Veal, Porcini Mushrooms and Spinach

Rustic Style Pasta with Veal, Porcini Mushrooms and Spinach

Chicken & Eggplant Parmigiana

Eggplant

Chicken cutlets

Chicken Cutlets

San Marzano Tomatoes San Marzano Tomato Sauce

Eggplant & Chicken Parmigiana

Chicken & Eggplant Parmigiana
I know what you’re thinking!  Is she out of her mind to do all that work. Ok, I got some “splainin” to do. When I don’t cook during the weeknight, I feel like I let my family down, because they enjoy my cooking for the most part. I had class one day, and by the time I got home, I looked at the chicken cutlets, and said to myself, what am I going to do with them? I decided, I wasn’t going to cook, and order in. That’s what we did. The next day, I still had to come up with an idea for the chicken. I wanted to dress it up, and make up for not cooking the night before. I found an eggplant in my veggie bin, had plenty of eggs, olive oil, and seasoned breadcrumbs. The lightbulb went on in my head, how about making a Chicken & Eggplant Parmigiana combo. It was crazy but I had my mind-set on it. I normally make eggplant parm or chicken parm separately, but this time, I decided to combine them. This dish was a big hit, and when I saw the smile on my family’s face, I knew I had redeemed myself. I must admit, I was happy with the result. Of course, my kitchen was a mess, but it was worth all the work. I suggest you make this on the weekend when you have some time to spare, and I promise you, your family will adore you for it.

This is a recipe that I created in My Kitchen, and I’m excited to share it with all of you.

Serves: 4-6
Level of difficulty: Medium-difficult
Total time from start to finish: 1 hour and 20 minutes

Ingredients: (1st set)

  • 1.25 – 1.5 lb. chicken cutlets (thinly sliced)
  • 1 eggplant, sliced
  • 3 eggs, beaten
  • Lots of seasoned breadcrumbs
  • Lots of extra virgin olive oil, or regular olive oil
  • 1/2 lb. fresh Mozzarella, sliced
  • Pecorino Romano or Parmigiano Reggiano cheese, grated
  • Salt and pepper to taste

Preparation:

1) Season eggplant with salt and pepper, let it sit for at least 10-minutes. Dip the eggplant in eggs, then hold it for a second to remove any excess, drench in seasoned breadcrumbs. (always shake of excess) . Do it one at a time, (eggs, +breadcrumbs) Place them on a dish.  Time to pan-fry them.

2) On medium-high heat, cover the bottom of a large pan with olive oil, pan fry the eggplants in a single layer, 3 minutes on one side, and 3 minutes on the other side. Remove, and repeat the same method over.  It’s ok, if oil is a little dirty, add more oil, if necessary. Set the eggplant aside. If you feel like the burner is too hot, just lower the heat a little.

Ingredients for the sauce:

  • 1 large can of whole tomatoes, (San Marzano)
  • 4 garlic cloves, chopped
  • 1 large basil leaf, torn
  • Salt & Pepper to taste
  • 1/4 cup or so of extra virgin olive oil

    Preparation:

    1) In a medium-sized saucepan, on medium-high heat, heat up the oil, sauté the garlic for a minute or so. Add the tomatoes, and crush them using a potato masher.  You can also use your hands to crush them before putting them in the pot. Drop the basil, season with salt and pepper, and simmer for about 15 minutes. While the sauce is simmering on low, you will be preparing the chicken.

    2) Season chicken with salt and pepper, dip in eggs, and seasoned breadcrumbs, set aside. In the meanwhile, clean up the pan you fried the eggplant in, (just drain old oil, and wipe clean with a paper towel. Start with some fresh olive oil. You will be using the same method as the eggplant. Pan fry for 2 minutes on one side, and 1 minute on other side. Do not taste the chicken at this point, as it may not be fully cooked. It will finish cooking in the oven. Work in batches, then repeat the same process over.

    3) By this time, the eggplant, the sauce and the chicken are ready to be assembled in a large casserole baking dish.  Spread some sauce on the bottom of dish,  arrange the chicken, (as much as you can fit) add some sauce, grated cheese, Mozzarella, layer with eggplant, and repeat. You may end up with an extra piece or two of chicken, just fit  them somewhere, it doesn’t have to be perfect. You are not building a house, LOL!  Finish with Mozzarella on top.

    4) Bake in a 375 degree F. oven for 15 minutes and broil for 5 minutes.

    Tip: Always make sure oil is hot before frying, otherwise, the eggplant will come out soggy and drenched in oil.

    I hope you will try this delicious dish. If you are on a budget, you do not have to use expensive brands. Any canned tomatoes will do the job, and some regular parmesan cheese. If fresh mozzarella is too expensive, just use the packaged ones.

    Pairing suggestions: A lovely Chianti, Rosso di Montalcino, Vino Nobile, or a Montepulciano d’Abruzzo. You can find the last one reasonably priced.  They are all Italian wines, as I like to pair the cuisine and the wines from the same country together. Sometimes, it can even be broken down by region, especially in Italian cooking,  where many dishes are very regional.  Ideally, you would pair the dish with a wine from the same region.

    Buon Appetito!

    Gina, from Foodiewinelover

Delectable Veal Ossobuco

Veal Ossobuco

Mise en place for Veal Ossobuco

Tomato paste

Veal Ossobuco

Veal Ossobuco

Prepping for Veal Ossobuco

Ossobuco is the Italian name for bone with a hole that has the marrow inside it. Veal Ossobuco is a hearty and delicious rustic veal-shank stew. This meal originated in Milan, and it’s usually served with a side of Risotto alla Milanese, (with saffron).  The veal shank is usually cut up in 1 – 1.5 inch thick, and is braised in a tomato-based and wine sauce. It’s the kind of meat that needs to be slow-cooked in order for it to become tender. I came up with this scrumptious recipe, and I am happy to share it with all of you.

Serves: 4   Degree of difficulty: Medium
Total preparation and cooking time:  About 2 hours.

Ingredients:

  • 3.5 lb. veal shank, cut up in 1 – 1.5 inch thick *
  • 3 tbsp. extra virgin olive oil, + more as needed
  • 1/2 cup dry white wine (chardonnay)
  • 2 cups of low-sodium chicken broth
  • 1/2 cup chopped tomatoes, fresh or canned
  • 1 tbsp. tomato paste
  • 3 carrots, sliced
  • 1/2 fennel bulb, sliced (can substitute with celery)
  • 5 garlic cloves, chopped
  • 1 medium onion, chopped
  • Salt and freshly ground pepper to taste
  • 1/2 tsp. thyme
  • 1/2 cup of flour
    Preparation:1) Preheat oven to 350 degrees F.2) In the meanwhile, season veal with salt and pepper. Drench in flour and shake off the excess. Discard any leftover flour.

    3) In a Dutch-Oven pot, on medium-high heat, heat up, 2-3 tbsp. olive oil, sear the veal for about 3 minutes on each side until it gets a nice brown color. You may have to work in batches depending how many veal shanks you have.

    4) Remove and set aside. In the same pot, add more oil, if necessary, and sautee the onions, carrots, fennel for 1-2 minutes, add garlic, 1 minute, then, tomato paste, and stir well until it caremelizes. Deglaze with the wine. Scrape the bottom of the pot and reduce for 1-2 minutes. Add the broth, tomatoes,  thyme, salt & pepper. Return the veal shanks in the pot. Bring to a boil, and turn the burner off.

    5) Place the pot covered in the middle rack of the oven, and let it braise for about 1.5 – 2 hours. Check occasionally for seasoning.

    6) While the veal is braising you can prepare the Risotto or a side dish of your choice.

*The meat is sometimes wrapped in a butcher twine to prevent it from falling apart, and maintain its beautiful shape. My butcher assured me that I didn’t need it this time, because of the thickness and the quality of the meat. He was right on.

Suggestions:  Typically, Gremolata is used as a garnish in this dish. It is a condiment made of either lemon or orange zest, chopped parsley and garlic.

Gremolata

Gremolata

My family and I savored this yummy meal, but the best part of this dish is the marrow inside the bone.  We were all fighting for the meat with the most marrow. It is succulent and is considered a delicacy.

I hope you will give this delectable recipe a try in your kitchen.

Wine suggestions: Chianti, Super Tuscan, Rosso di Montalcino, Aglianico, Montepulciano d’Abruzzo. They’re all  Italian wines and most of them are affordable.

Happy Cooking from My Kitchen to Yours!

Veal Ossobuco The best part…….

Veal OssobucoPlease note, I have made Ossobuco again since this blogpost, and updated the featured picture on 4/7/2016

My great friend Angela introduced me to another wonderful version of Ossobuco in a brown sauce. It’s her dad’s famous recipe, and it is equally as delicious.

Spaghetti al Pomodoro con Basilico

Spaghetti al Pomodoro con Basilico

San Marzano Tomatoes

San Marzano Tomatoes

Spaghetti al Pomodoro Con BasilicoSpaghetti al Pomodoro con Basilico is Italian for spaghetti in a tomato sauce with basil. It is one of the most traditional, and classic dish you will find in Southern Italy. It originated in Naples, the land of my paternal grandparents. In the Campania region, this dish is known to be a poor man’s dish because of the simple ingredients. It is made with
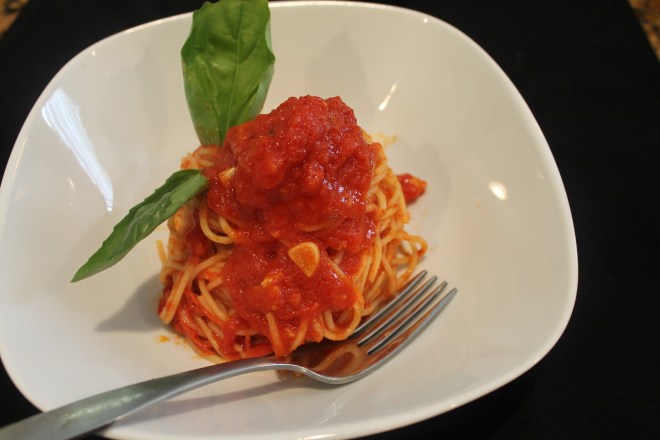
 San Marzano tomatoes that are indigenous to the area, where they are grown on volcanic soil. They are known to be the sweetest tomatoes in the world, very succulent, and less acidic. Here in the US, there is nothing poor about this dish, because it is made with high quality ingredients. There are many variations to this traditional dish, but today, I will share with the you the basic ingredients to make a killer sauce. Italians are very proud of their heritage, and DO NOT LIKE IT, (to put it mildly) when their original recipe is modified, or altered in any way. That is totally understandable, because they are trying to keep hundreds of years of traditions.  Unfortunately, when a traditional Italian recipe is recreated, it tends to lose some of its authenticity, primarily because an ingredient cannot be found, or because it is adapted to meet a person’s lifestyle. Ideally, fresh San Marzano tomatoes would be better, but they cannot be found in my area. Canned peeled San Marzano tomatoes with the D.O.P. label is perfectly acceptable, even by Italian standards. Follow me, Let’s get cooking!

Serves: 4-6 Difficulty: Easy

Ingredients:

  • 1 lb. Spaghetti, Anna brand, or any brand of your choice
  • 1/2 cup good quality extra virgin olive oil, + more to drizzle
  • 6 garlic cloves, sliced
  • 4-6 fresh basil leaves, divided
  • 2  (28- oz) canned-San Marzano, peeled tomatoes, Flora brand
  • Sea salt to taste, for sauce and pasta
  • Parmigiano-Reggiano or Grana Padano

    Preparation:
    1) Do your prepping, slice the garlic, leave one can peeled tomatoes whole, and crush the other one with your hands like the Italians do. It’s so much fun to use your hands, but, I use gloves because I have very long fingernails. (If you want to cheat, put it in the blender for 5 seconds. I didn’t tell you that, shhhhh!) Chop up 2-3 basil leaves. Set aside.2) In the meanwhile, bring water to a boil for the pasta. While that’s happening, you will have plenty of time to make the sauce.3) In a medium-size pot, heat up the olive oil over medium-high heat, sautee the garlic, as soon as it releases its aroma, (if you wait too long, the garlic will burn, and have a bitter taste) drop the peeled tomatoes, the hand-crushed tomatoes, basil, and salt to taste. Bring to a quick boil, lower the heat to medium – medium-low, simmer uncovered  for about 10 minutes. Stir occasionally.

    4) You will be working simultaneously, while your sauce is simmering, the pasta water will come to a boil, add salt to taste, and cook pasta al dente, (to the bite). Follow package directions, minus 2 minutes of cooking time.  To check for doneness, I do it the old fashion way, I taste a strand or two of pasta.

    5) Drain pasta. By this time, the sauce should be done. Pour the pasta in the sauce, turn off the burner, and mix very well until every strand of spaghetti is coated with the sauce. It will look like a lot of sauce, but the pasta will absorb it in no time. Some cooks don’t crush the tomatoes, but that’s a personal preference.

    6) Put the spaghetti in a pasta bowl, add a little sauce on top, drizzle some extra virgin olive oil, and garnish with basil leaves. That’s it!

    Tip #1) please note, black pepper is not used, because the tomatoes are the featured ingredients in this dish.  I didn’t want the pepper to overpower the sweetness of the tomatoes.  This is the case, where less is more in this particular dish.

    Tip #2) Some Italian cooks prefer to serve the grated cheese, Parmigiano Reggiano or Grana Padano on the side.

    Tip #3) Do not throw the pasta on the wall to check for doneness. Use the timer, or simply taste it.

    Tip #4) It is not necessary to put oil in the pasta water. Just stir the pasta at the beginning, to avoid them from sticking to each other. Once they start cooking, they will separate from each other.

    You will pay a premium price for these canned tomatoes, but it will be worth the dining experience. Take it from me, I have been in the kitchen for the last 25 years.

    I have used different brands of San Marzano tomatoes, but I must tell you, it was the first time I tried the Flora brand, and my family and I could not get over the sweetness, and the complex flavors of the tomatoes. I am certain there are many other great brands out there. This is my opinion, and I did not get compensated to write about it.  I’m simply sharing my experience with you in Gina’s Kitchen.

    A little known fact, Neapolitan pizza is made with San Marzano tomatoes,  known to be the best pizza in the world. Now, you can finally understand the reasoning behind it.

    I recommend a delicious Italian red wine to pair with this scrumptious dish. A super Tuscan, a Chianti, a Rosso, the list is endless, and the choice is yours. If you can find Lacryma Christi, it would pair beautifully, since it’s from the same region, and similar volcanic soil as the tomatoes.

    All the images belong to me, Foodiewinelover, except for the last image of the tomatoes. Photo credit is given to Goldlocki, found in Wikipedia.

    Spaghetti al pomodoro con basilico

Everything you see, I owe it to Spaghetti As Sophia Loren puts it, “Every thing you see, I owe it to Spaghetti.”

San Marzano Tomatoes

I hope you will try this delectable sauce, and share your experience with me.

Buon Appetito!

Happy Crushing!

Caprese Salad

CapreseSaladFoodiewinelover
In 2007, my family and I embarked on an amazing Italian trip, and one of the itineraries was Capri. It is a breathtaking island, and we took a ferry from the bay of Naples to get there.  We visited the famous Blue Grotto, ate some regional cuisine, and took a tour of the island. I must admit, I was very scared going up the mountains on the tour bus, but it  was a travel experience that I will never forget. Today, I am sharing with you an easy and delicious dish, the Caprese Salad.

It’s been in the 90’s already in South Florida, and I couldn’t think of a more refreshing salad, called Insalata Caprese, in Italian.  It literally means Capri Salad because it originated in that magnificent island. In Italy, it is usually served as an antipasto, and made with fresh mozzarella, tomato, and basil. The colors represent the Italian flag. My son recently brought me home a basil plant, and I already had some beefsteak tomatoes, and leftover Mozzarella that I recently used in my Chicken Parmigiana. I always have extra virgin olive oil, and balsamic vinegar readily available. I was on the go, and needed a quick-lunch, and this salad hit the spot. It was a great way to reminisce about our trip. (We were there again in 2008, but that’s another blogpost.)

Serves: 2 as a meal – Super easy

Ingredients:

  • 1 Beefsteak Tomato, sliced
  • Fresh Mozzarella, sliced
  • Basil leaves, for garnish
  • Drizzle of extra virgin olive oil
  • Drizzle of Balsamic vinegar, of Modena
  • Salt & Pepper to taste

Preparation:

Arrange the tomatoes and Mozzarella on a serving plate, lightly season with salt & pepper, liberally drizzle with olive oil, and some balsamic vinegar. Garnish with basil leaves.

Voila, the salad is ready to be served! It is such a beautiful culinary creation, and so easy to prepare. Make it for your guests, and I assure you, they will love it.

Happy Cooking from My Kitchen To Yours!

Gina

OLYMPUS DIGITAL CAMERA

Capri, Italy, June 2007 – Hubby and me


Stuffed Zucchini Blossoms

Zucchini Blossoms

Stuffed Zucchini Blossoms

When I lived in New Jersey many years ago, my uncle used to have a zucchini garden in the summertime. He often made Stuffed Zucchini Blossoms, and I always enjoyed them. He also put them in scrambled eggs. Since then, I moved to South Florida, and could not find them anywhere.  On occasions, I would enjoy some, at a nearby Italian restaurant, but I always wanted to make it in my kitchen. Recently, my son PJ told me, he knows someone who’s growing zucchini. I screamed on the top of my lungs, and told him to get me some. Well, he came through for me, because today he brought me a nice amount of them. Needless to say, I was ecstatic.

Since I’ve never made them, I sought the assistance of some amazing friends who guided me in putting this recipe together. Giusy gave me the ratio for the beer and flour batter, and Angela suggested to make them the traditional Roman style, with fresh mozzarella and anchovies. It was a MAJOR HIT!

Serves: 4-8 Total:  15 zucchini flowers, keep them in a cool place so they don’t wilt.  Level of difficulty: Medium, because it takes a little time, and you have to treat them gingerly.

   Ingredients:

  • 15 zucchini blossoms, (flowers)
  • 1 cup beer, room temperature (Heineken)
  • 1 cup all-purpose flour
  • Olive oil for frying
  • Salt & Pepper to taste
  • Anchovies, fillet flat, 1 can
  • Fresh Mozzarella cheese, as needed
    Preparation:


    1) With a dry paper towel, gently clean the flowers. Remove the stamens, (pollen inside the flower) DO NOT ATTEMPT TO WASH THEM, YOU WILL BREAK THEM.

    2) Stuff each flower with a dollop of mozzarella cheese, (about 1 teaspoon or so depending on their size) and 1/2 of an anchovy fillet. Squeeze the top of the flower gently to close it. It will not be perfect, don’t worry about it. The batter will protect the stuffing while cooking. Set aside.

    3) Prepare the batter, by combining the flour with the beer. Season with salt and pepper to taste. Mix well with a whisk until you obtain a creamy texture.

    4) In the meanwhile, pour oil to cover the bottom of a frying pan, heat up on medium-high heat. Gently place the zucchini flowers in the batter, making sure, they are coated well. ( I did them in batches) and drop them in the hot oil. It will be messy, and it’s ok, just have confidence. Cook on one side for about 2-3 minutes, lower flame, if it’s too high, you want them light golden brown and not dark brown. Cook other side for another 2 minutes. Remove promptly. Serve at once. They will literally melt in your mouth. If you don’t like anchovies, then omit them. (sorry, but you will miss out). My family went bananas over this stuffing. You can also stuff them with ricotta cheese, and use club soda instead of beer, for a lighter batter.

    Please keep in mind a recipe is to be used as guideline, it’s up to you, the homecook, to watch the food, and use your judgement. Adjust the temperature setting as necessary. When frying, always make sure the oil very hot, otherwise, the food will come out soggy, and not presentable.

    This batter can be used to fry some veggies such as zucchini and cauliflower. The choice is yours.

    I hope you will have some fun in your kitchen, and try this delectable recipe.

    Happy Cooking From My Kitchen To Yours,

    Gina

    Stuffed Zucchini Blossoms