Appetizers

Caprese Salad

CapreseSaladFoodiewinelover
In 2007, my family and I embarked on an amazing Italian trip, and one of the itineraries was Capri. It is a breathtaking island, and we took a ferry from the bay of Naples to get there.  We visited the famous Blue Grotto, ate some regional cuisine, and took a tour of the island. I must admit, I was very scared going up the mountains on the tour bus, but it  was a travel experience that I will never forget. Today, I am sharing with you an easy and delicious dish, the Caprese Salad.

It’s been in the 90’s already in South Florida, and I couldn’t think of a more refreshing salad, called Insalata Caprese, in Italian.  It literally means Capri Salad because it originated in that magnificent island. In Italy, it is usually served as an antipasto, and made with fresh mozzarella, tomato, and basil. The colors represent the Italian flag. My son recently brought me home a basil plant, and I already had some beefsteak tomatoes, and leftover Mozzarella that I recently used in my Chicken Parmigiana. I always have extra virgin olive oil, and balsamic vinegar readily available. I was on the go, and needed a quick-lunch, and this salad hit the spot. It was a great way to reminisce about our trip. (We were there again in 2008, but that’s another blogpost.)

Serves: 2 as a meal – Super easy

Ingredients:

  • 1 Beefsteak Tomato, sliced
  • Fresh Mozzarella, sliced
  • Basil leaves, for garnish
  • Drizzle of extra virgin olive oil
  • Drizzle of Balsamic vinegar, of Modena
  • Salt & Pepper to taste

Preparation:

Arrange the tomatoes and Mozzarella on a serving plate, lightly season with salt & pepper, liberally drizzle with olive oil, and some balsamic vinegar. Garnish with basil leaves.

Voila, the salad is ready to be served! It is such a beautiful culinary creation, and so easy to prepare. Make it for your guests, and I assure you, they will love it.

Happy Cooking from My Kitchen To Yours!

Gina

OLYMPUS DIGITAL CAMERA

Capri, Italy, June 2007 – Hubby and me


Stuffed Zucchini Blossoms

Zucchini Blossoms

Stuffed Zucchini Blossoms

When I lived in New Jersey many years ago, my uncle used to have a zucchini garden in the summertime. He often made Stuffed Zucchini Blossoms, and I always enjoyed them. He also put them in scrambled eggs. Since then, I moved to South Florida, and could not find them anywhere.  On occasions, I would enjoy some, at a nearby Italian restaurant, but I always wanted to make it in my kitchen. Recently, my son PJ told me, he knows someone who’s growing zucchini. I screamed on the top of my lungs, and told him to get me some. Well, he came through for me, because today he brought me a nice amount of them. Needless to say, I was ecstatic.

Since I’ve never made them, I sought the assistance of some amazing friends who guided me in putting this recipe together. Giusy gave me the ratio for the beer and flour batter, and Angela suggested to make them the traditional Roman style, with fresh mozzarella and anchovies. It was a MAJOR HIT!

Serves: 4-8 Total:  15 zucchini flowers, keep them in a cool place so they don’t wilt.  Level of difficulty: Medium, because it takes a little time, and you have to treat them gingerly.

   Ingredients:

  • 15 zucchini blossoms, (flowers)
  • 1 cup beer, room temperature (Heineken)
  • 1 cup all-purpose flour
  • Olive oil for frying
  • Salt & Pepper to taste
  • Anchovies, fillet flat, 1 can
  • Fresh Mozzarella cheese, as needed
    Preparation:


    1) With a dry paper towel, gently clean the flowers. Remove the stamens, (pollen inside the flower) DO NOT ATTEMPT TO WASH THEM, YOU WILL BREAK THEM.

    2) Stuff each flower with a dollop of mozzarella cheese, (about 1 teaspoon or so depending on their size) and 1/2 of an anchovy fillet. Squeeze the top of the flower gently to close it. It will not be perfect, don’t worry about it. The batter will protect the stuffing while cooking. Set aside.

    3) Prepare the batter, by combining the flour with the beer. Season with salt and pepper to taste. Mix well with a whisk until you obtain a creamy texture.

    4) In the meanwhile, pour oil to cover the bottom of a frying pan, heat up on medium-high heat. Gently place the zucchini flowers in the batter, making sure, they are coated well. ( I did them in batches) and drop them in the hot oil. It will be messy, and it’s ok, just have confidence. Cook on one side for about 2-3 minutes, lower flame, if it’s too high, you want them light golden brown and not dark brown. Cook other side for another 2 minutes. Remove promptly. Serve at once. They will literally melt in your mouth. If you don’t like anchovies, then omit them. (sorry, but you will miss out). My family went bananas over this stuffing. You can also stuff them with ricotta cheese, and use club soda instead of beer, for a lighter batter.

    Please keep in mind a recipe is to be used as guideline, it’s up to you, the homecook, to watch the food, and use your judgement. Adjust the temperature setting as necessary. When frying, always make sure the oil very hot, otherwise, the food will come out soggy, and not presentable.

    This batter can be used to fry some veggies such as zucchini and cauliflower. The choice is yours.

    I hope you will have some fun in your kitchen, and try this delectable recipe.

    Happy Cooking From My Kitchen To Yours,

    Gina

    Stuffed Zucchini Blossoms

Shrimp Saganaki

FoodieWineLoverDecember2014 029


Shrimp Saganaki

I love everything Greek! After all, I’m married to one, and to his Big Fat Greek family.  One of the things they enjoy doing, is eating, and they love celebrating everything with food. I do have some knowledge on the Greek culture, because I had the opportunity to visit some beautiful places in Greece. I’ve also made some wonderful Greek friends on Facebook. One of the biggest staples in Greek cooking is Feta cheese, and I love it on almost everything. There’s nothing more Greek than that in my opinion. I love it in salads, omelettes, recipes, with Pita bread, or by itself. Today, I will share with you a lovely recipe made with shrimp and feta cheese, and it’s a winner in my book. The name Saganaki is given to dishes that are cooked in this frying pan, with two handles. Traditionally, this pan is used in making shrimp dishes, and to flambe’ some delicious Greek cheeses. You don’t need this specific pan to make this recipe, but I wanted to share some of the Greek traditions with you. Some traditional recipes call for tomato paste which I love using, and they also leave the shell on the shrimp. It does make for a killer presentation.

Serves: 6-8 Level of difficulty: Easy

 Ingredients: 

  •  1.5 – 2 lb. large shrimp, peeled and deveined, tails on
  •  3 tbsp. olive oil + more
  • 6-8 garlic cloves, chopped
  • 1 pint roasted cherry tomatoes
  • 2 tsp. oregano
  • 1/2 – 3/4 ounce ouzo, Greek liqueur
  • Salt and black pepper to taste *
  • 4-6 oz. Feta cheese, crumbled *
  • Flat leave parsley, chopped for garnish

Preparation:

1) Place tomatoes on a tray, drizzle with olive oil and salt. Bake in a 375 degree oven for 20-30 minutes, or until caramelized.

2) In the meanwhile, In a “Saganaki” or a large frying pan, over medium-high heat, heat olive oil, sautee the garlic, 1 minute, add the shrimp. Cook for about 3 minutes. Deglaze with ouzo, turn the shrimp, add the tomatoes, oregano, black pepper, cook for 2 minutes. Lower the flame to medium-heat,  add the Feta cheese, and cook an additional 1-2 minutes, or until the shrimp are no longer translucent. Garnish with parsley. Drizzle with olive oil. Serve with orzo, potatoes or pasta. I served mine with whole-wheat angel hair. This dish makes a wonderful meze, which is Greek for snack or appetizers.

*Be careful with the salt, as the feta is already salty. I like to buy the feta in a container, and crumble it myself. It has a fresher taste than the already crumbled one.

If you don’t have ouzo readily available, use some dry white wine, it will be the next best thing. However, ouzo is the way to go in this dish, in my opinion.

I hope you have enjoyed this blogpost, and will attempt to make it soon for your loved ones. It will be the talk of the town, I promise you.

Happy Cooking from My Kitchen to Yours!

Gina/Foodiewinelover
My Food, Wine & Travel Lifestyles


Finger Licking Chicken Wings

Chicken Wings

Chicken Wings

Most of the time we go out to eat chicken wings, and usually order it Buffalo style.  This time, I have created an Asian/Caribbean fusion version of this recipe that you will find absolutely delicious.

Serves: 6 – 8 as an appetizer – 4 as an entrée with a side dish.
Level of difficulty: Easy – medium

Ingredients:  

  • 4 lb. whole chicken wings
  • 3 tbsp. soy sauce, low sodium
  • 2 tbsp. olive oil
  • 6 garlic cloves
  • 2 handful of cilantro
  • 1 tbsp. red wine vinegar
  • 1 tsp. freshly grated ginger
  • 4 tbsp. honey
  • 2 scallions, chopped for garnish
  • Salt and ground pepper to taste
  • Pinch of red pepper flakes, optional


Preparation: 

1) In a blender, or food processor, combine soy sauce, olive oil, garlic, cilantro, vinegar, ginger. Blend together, but make sure there are bits and pieces of garlic to give it some texture. Set aside.

2) Place the chicken wings in a single layer on a large tray, season lightly with salt and black pepper to taste, (Soy sauce tend to be salty, please take it easy on the sodium) on both sides. Pour the mixture on the wings, drizzle the honey. Mix well with your hands, and make sure the wings are nicely coated with mixture. Cover with foil.

3) In a 350 degree oven, place the wings on bottom rack, bake for 30 minutes. Remove the tray from the oven.

4) Remove foil. Broil on the middle rack for 10 minutes. Turn them, broil other side for an additional 1o minutes.  The entire cooking process takes about 50 minutes.  (30 minutes baking, 20 minutes broiling) The wings should have a nice golden brown color, with a caramelized sauce. Please make sure, the chicken is cooked through before attempting to taste it.

Place the wings on a serving platter, with the sauce on the side. Garnish with scallions. Serve with a side dish of your choice, or as an appetizer. My family devoured all the wings in a blank of an eye. They thought it was a home run!

Happy Cooking! Keep Smiling at your food and your food will smile back at you.


Veal Meatballs with Pecorino Cheese & Sweet Italian Sausage

FoodieWineloverVealandSeafoodPasta 032

A few weeks ago, hubby asked me to cook for his golfing buddies, since they were playing near the house. I gracefully agreed, and decided to make some veal meatballs over spaghetti. When cooking for a hungry crowd, pasta is always a good idea. I could have easily made a meat sauce, but I decided to get a little fancy, and made meatballs with Pecorino cheese. These delicious meatballs were inspired by D’Angelo Pizza and Wine Bar, but I created my version.

FoodieWineloverVealandSeafoodPasta 003

FoodieWineloverVealandSeafoodPasta 005

FoodieWineloverVealandSeafoodPasta 007

VealMeatballs

FoodieWineloverVealandSeafoodPasta 009

FoodieWineloverVealandSeafoodPasta 012

FoodieWineloverVealandSeafoodPasta 014

FoodieWineloverVealandSeafoodPasta 016

Serves 8-10     Degree of difficulty: Medium – Difficult

This recipe can easily be divided in half. I am sharing it with you, because I was cooking for a crowd and needed a lot sauce. Normally, I recommend using a marinara sauce for these meatballs, as veal is a more delicate meat, and they can easily fall apart if don’t watch them carefully. In general, marinara is much quicker, where the standard sauce is a slow cooking process. Do not use the sausage in the marinara, as it will crowd the sauce too much. The veal by itself will make a nice appetizer to serve at a party, and will wow your guests. You can also serve them with a side of ricotta cheese. As you can see, there are many variations to this dish.
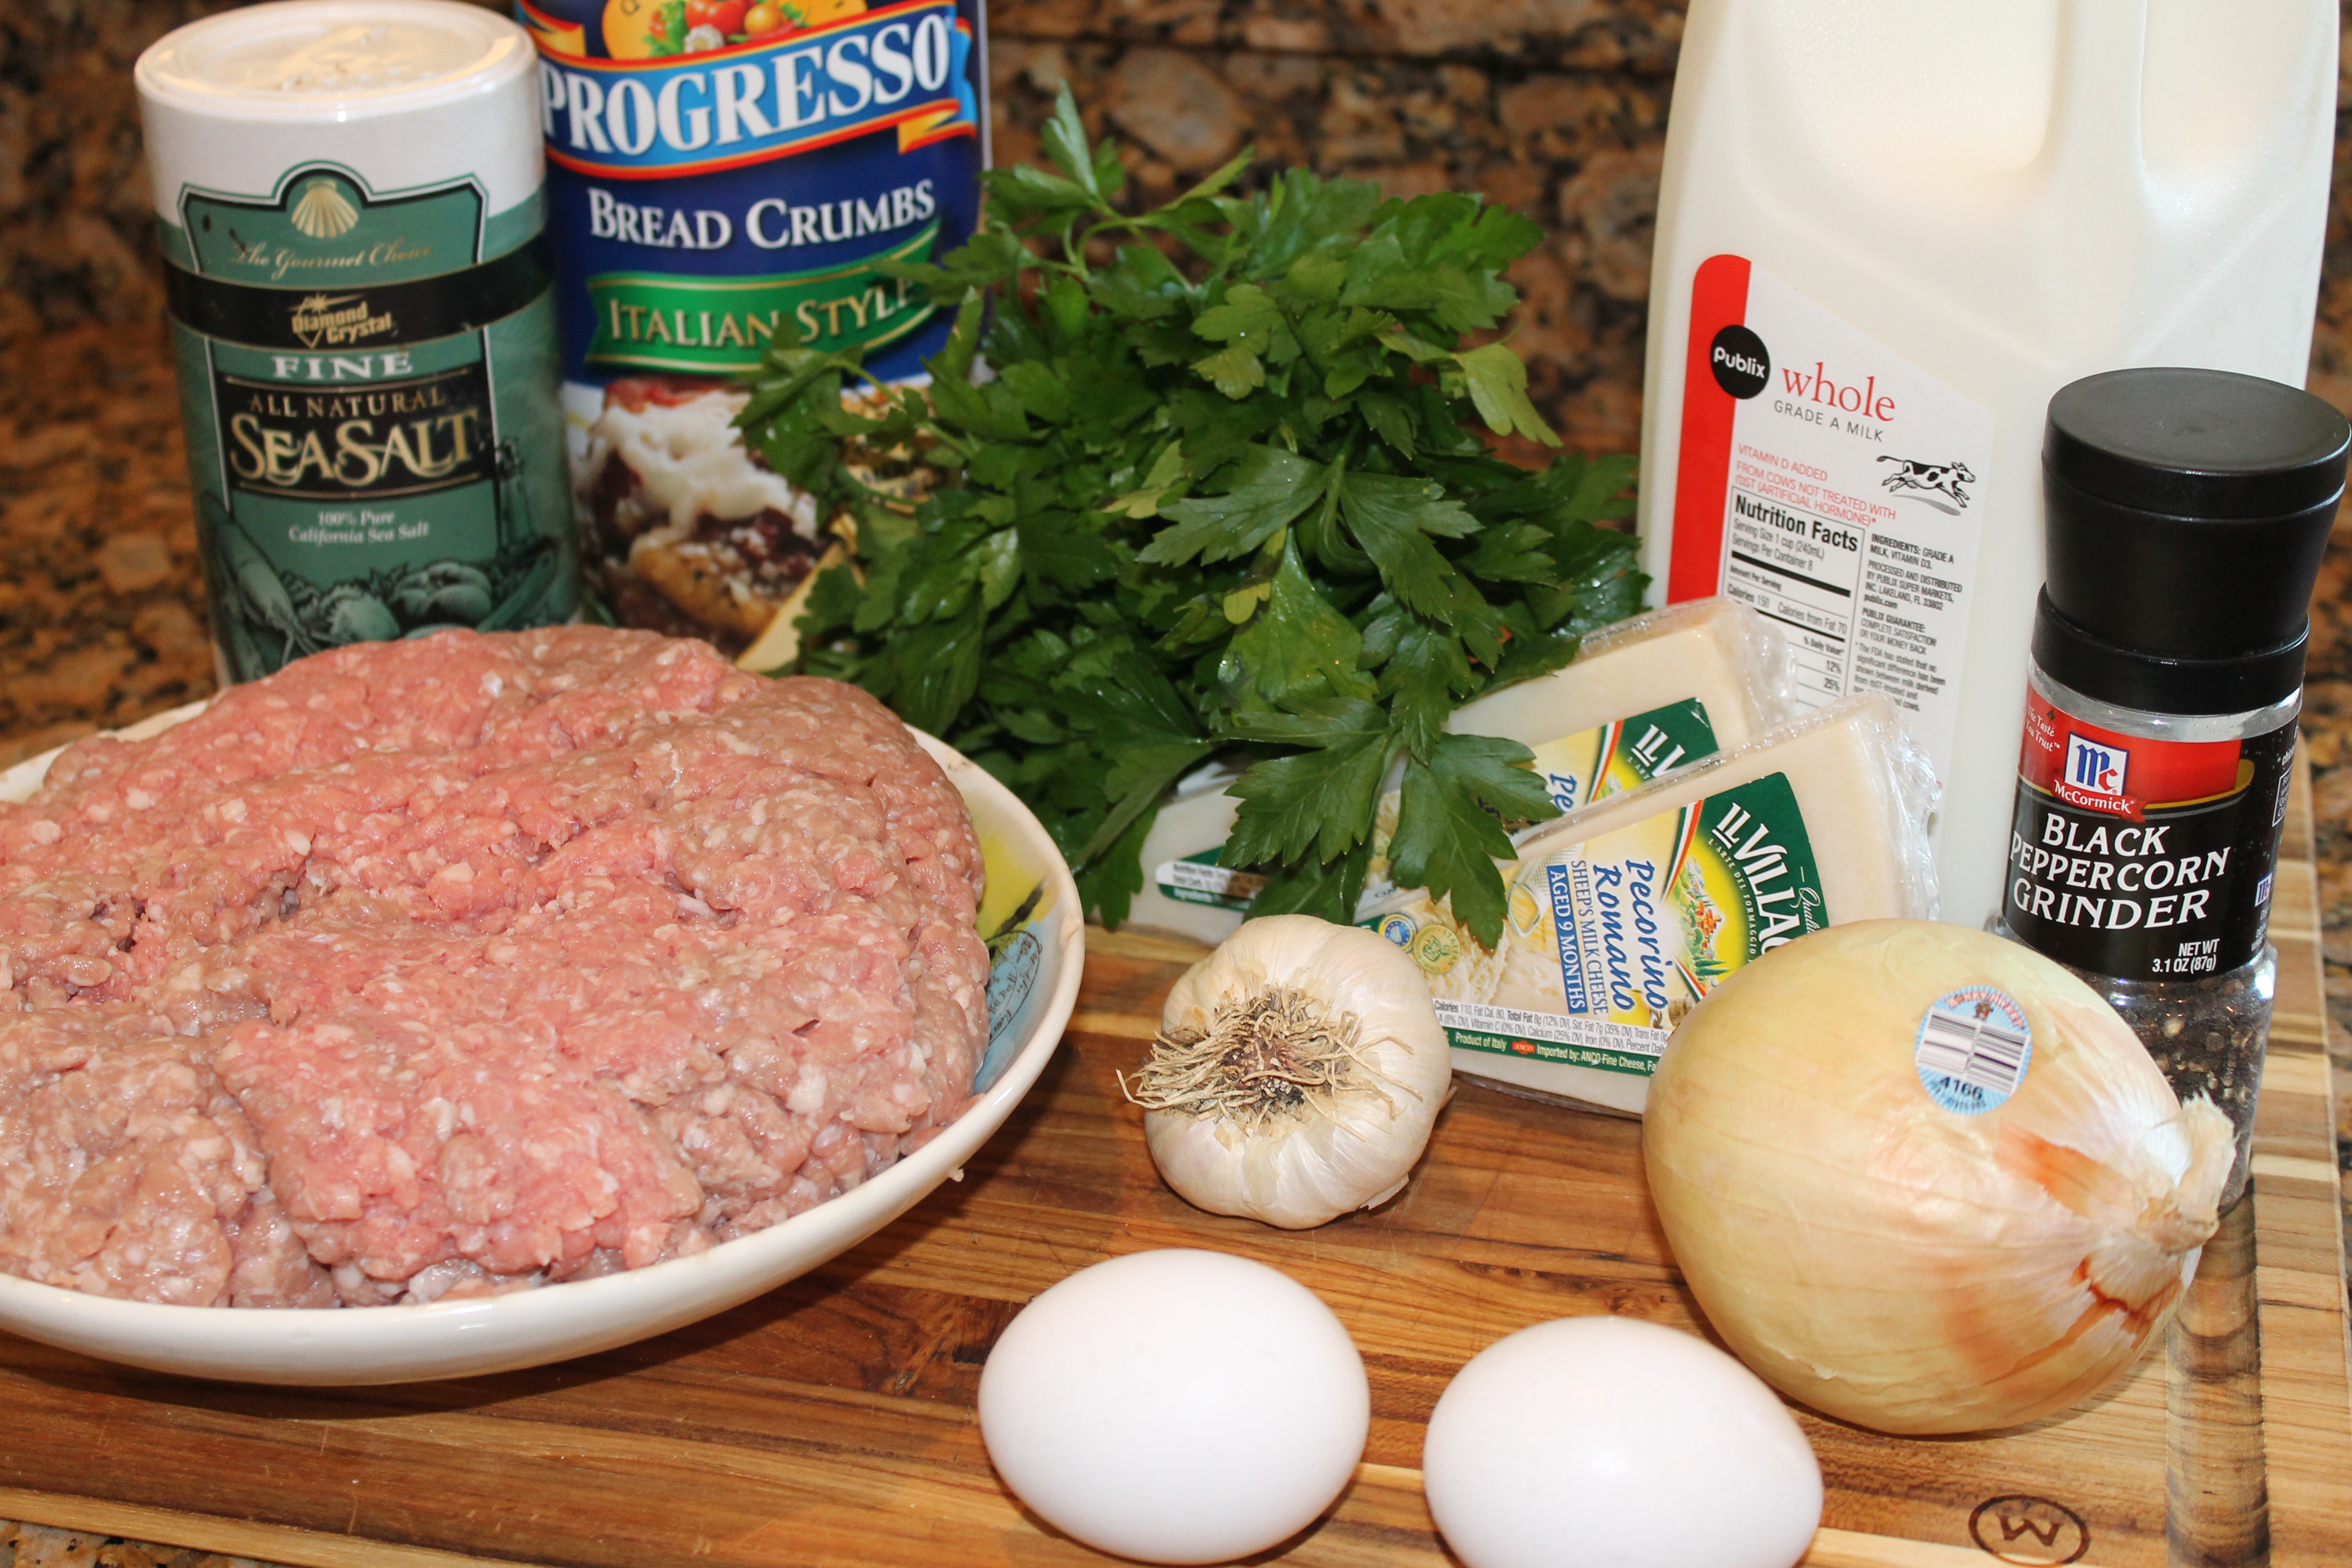
Ingredients:

  • 3 lbs. ground veal
  • 12 oz Pecorino Romano cheese, grated, divided in half
  • 1 small onion, grated
  • 1 large garlic clove, minced
  • 1/2 cup of whole milk
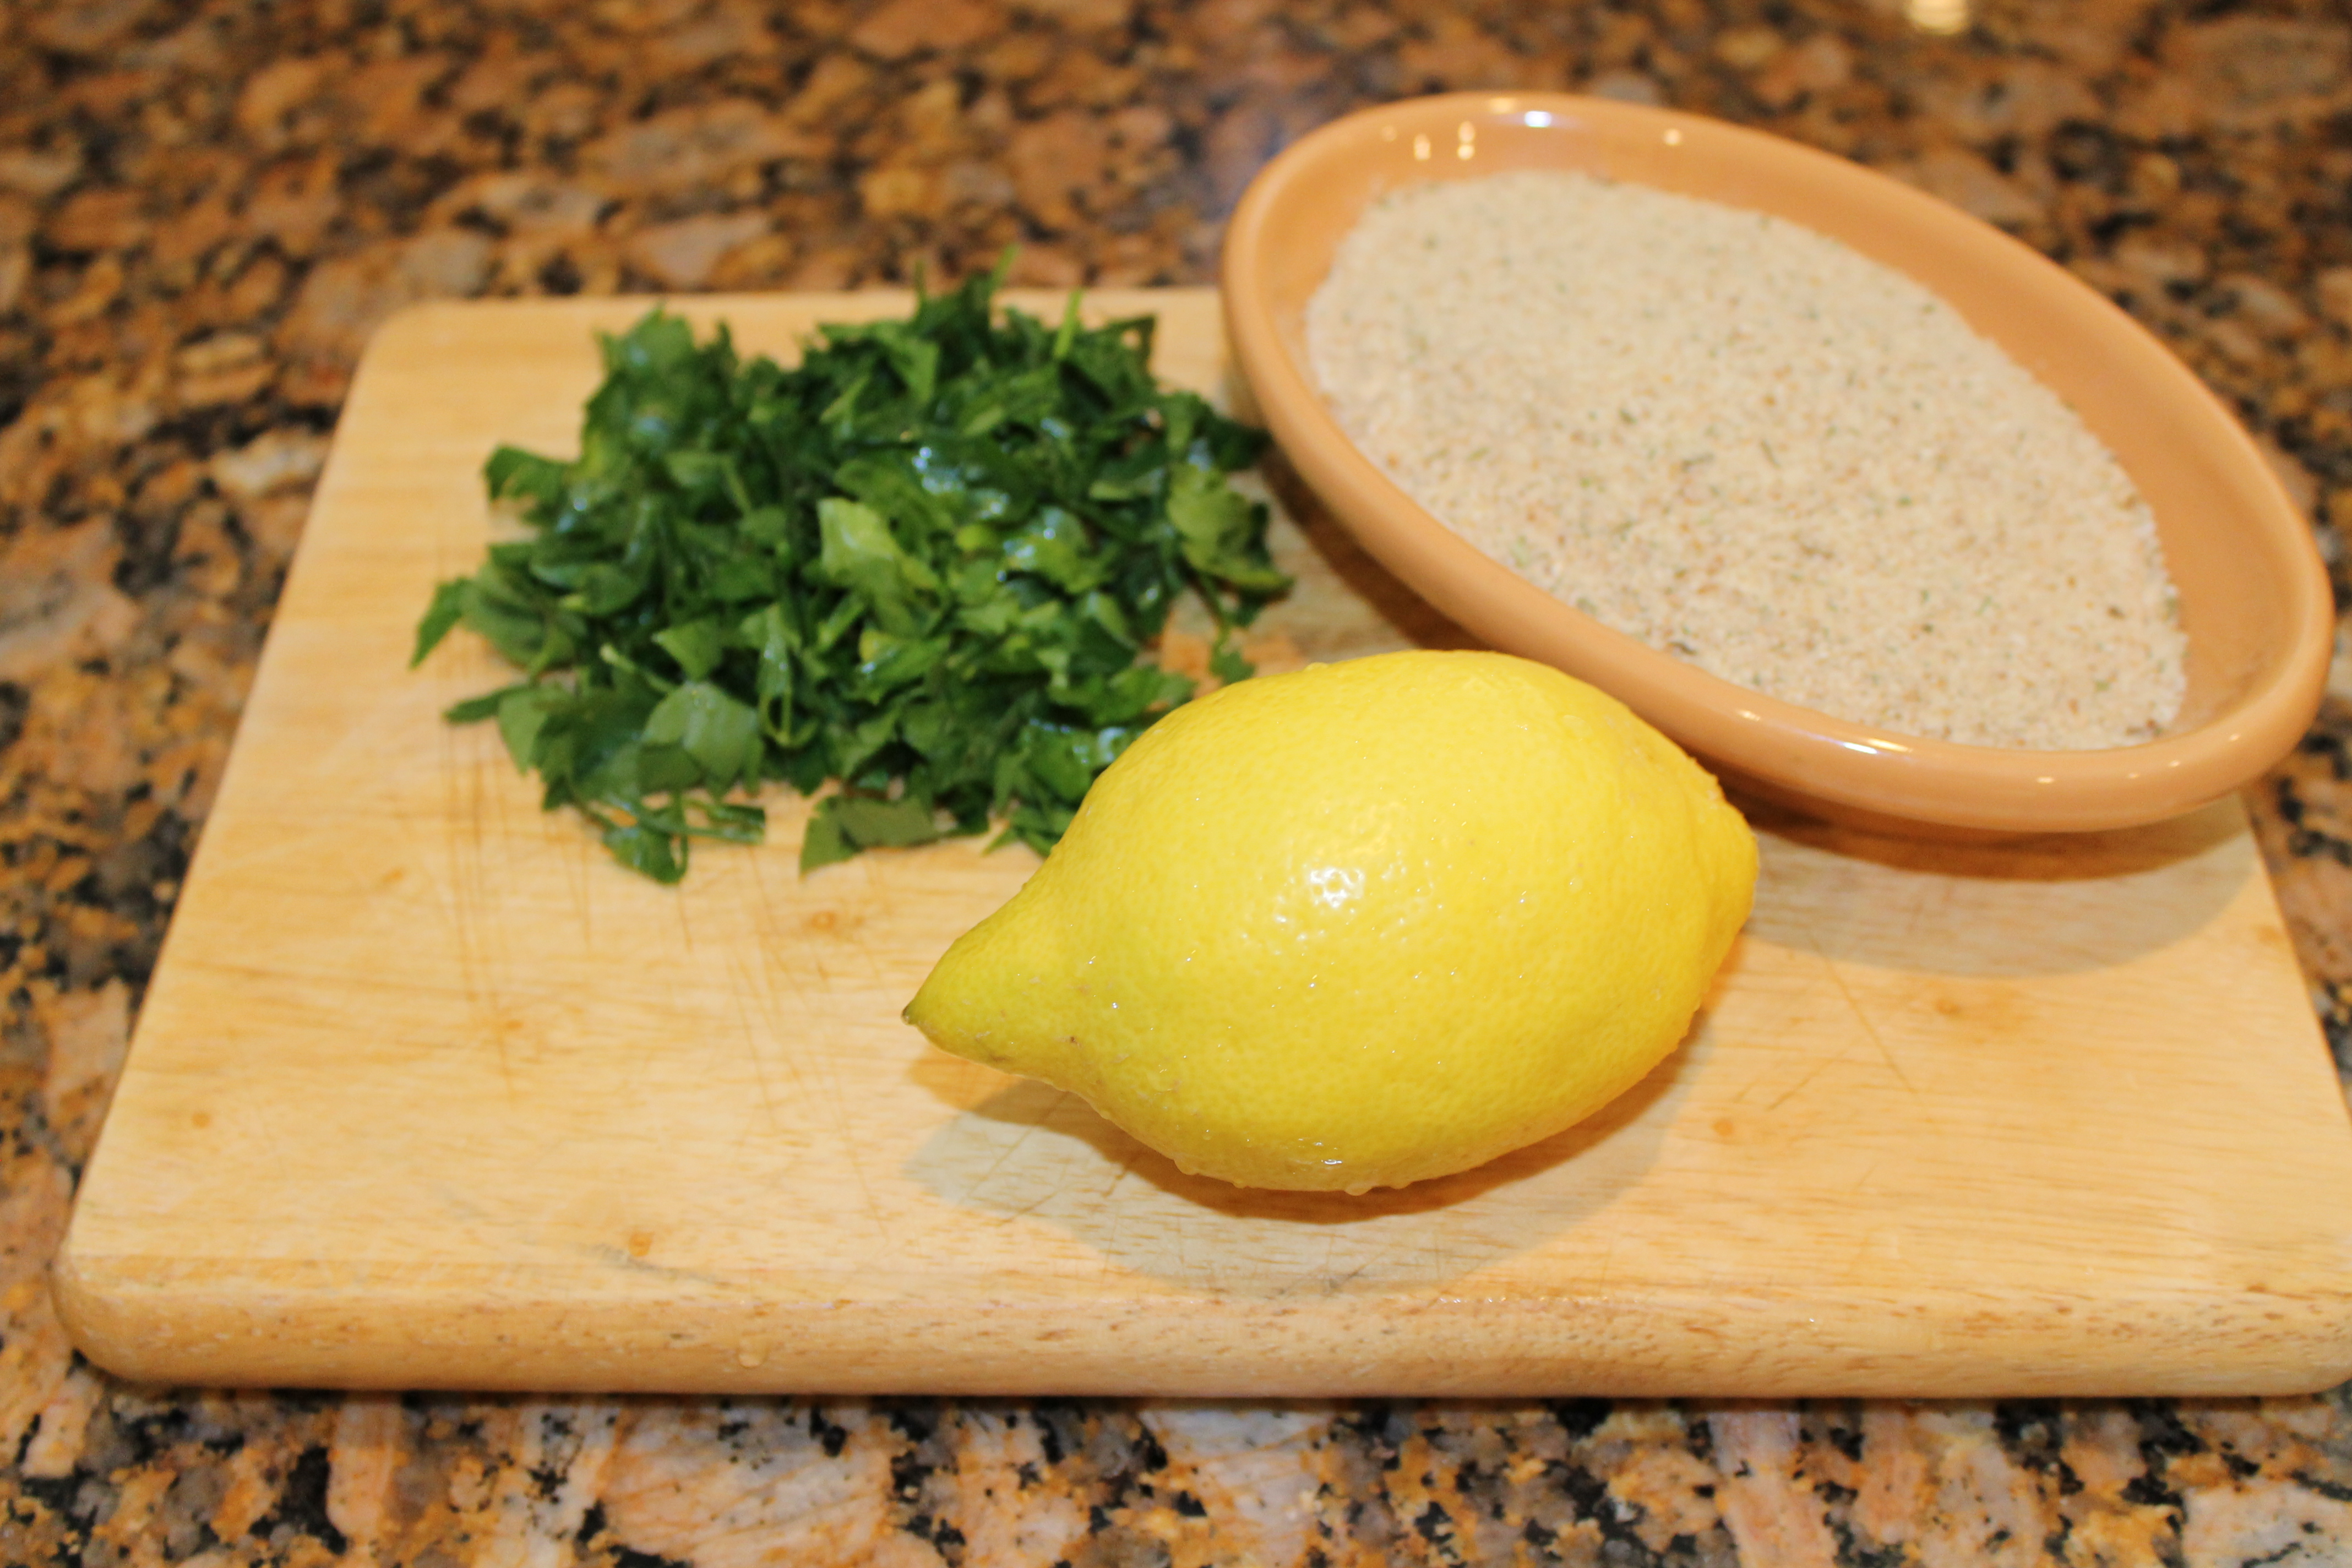
  •  3/4 cup seasoned breadcrumbs
  • Salt & Pepper to taste
  • A large handful of chopped Italian parsley, flat-leave
  • 2 eggs
  • 2 lbs of Spaghetti or any pasta of your choice

Preparation:

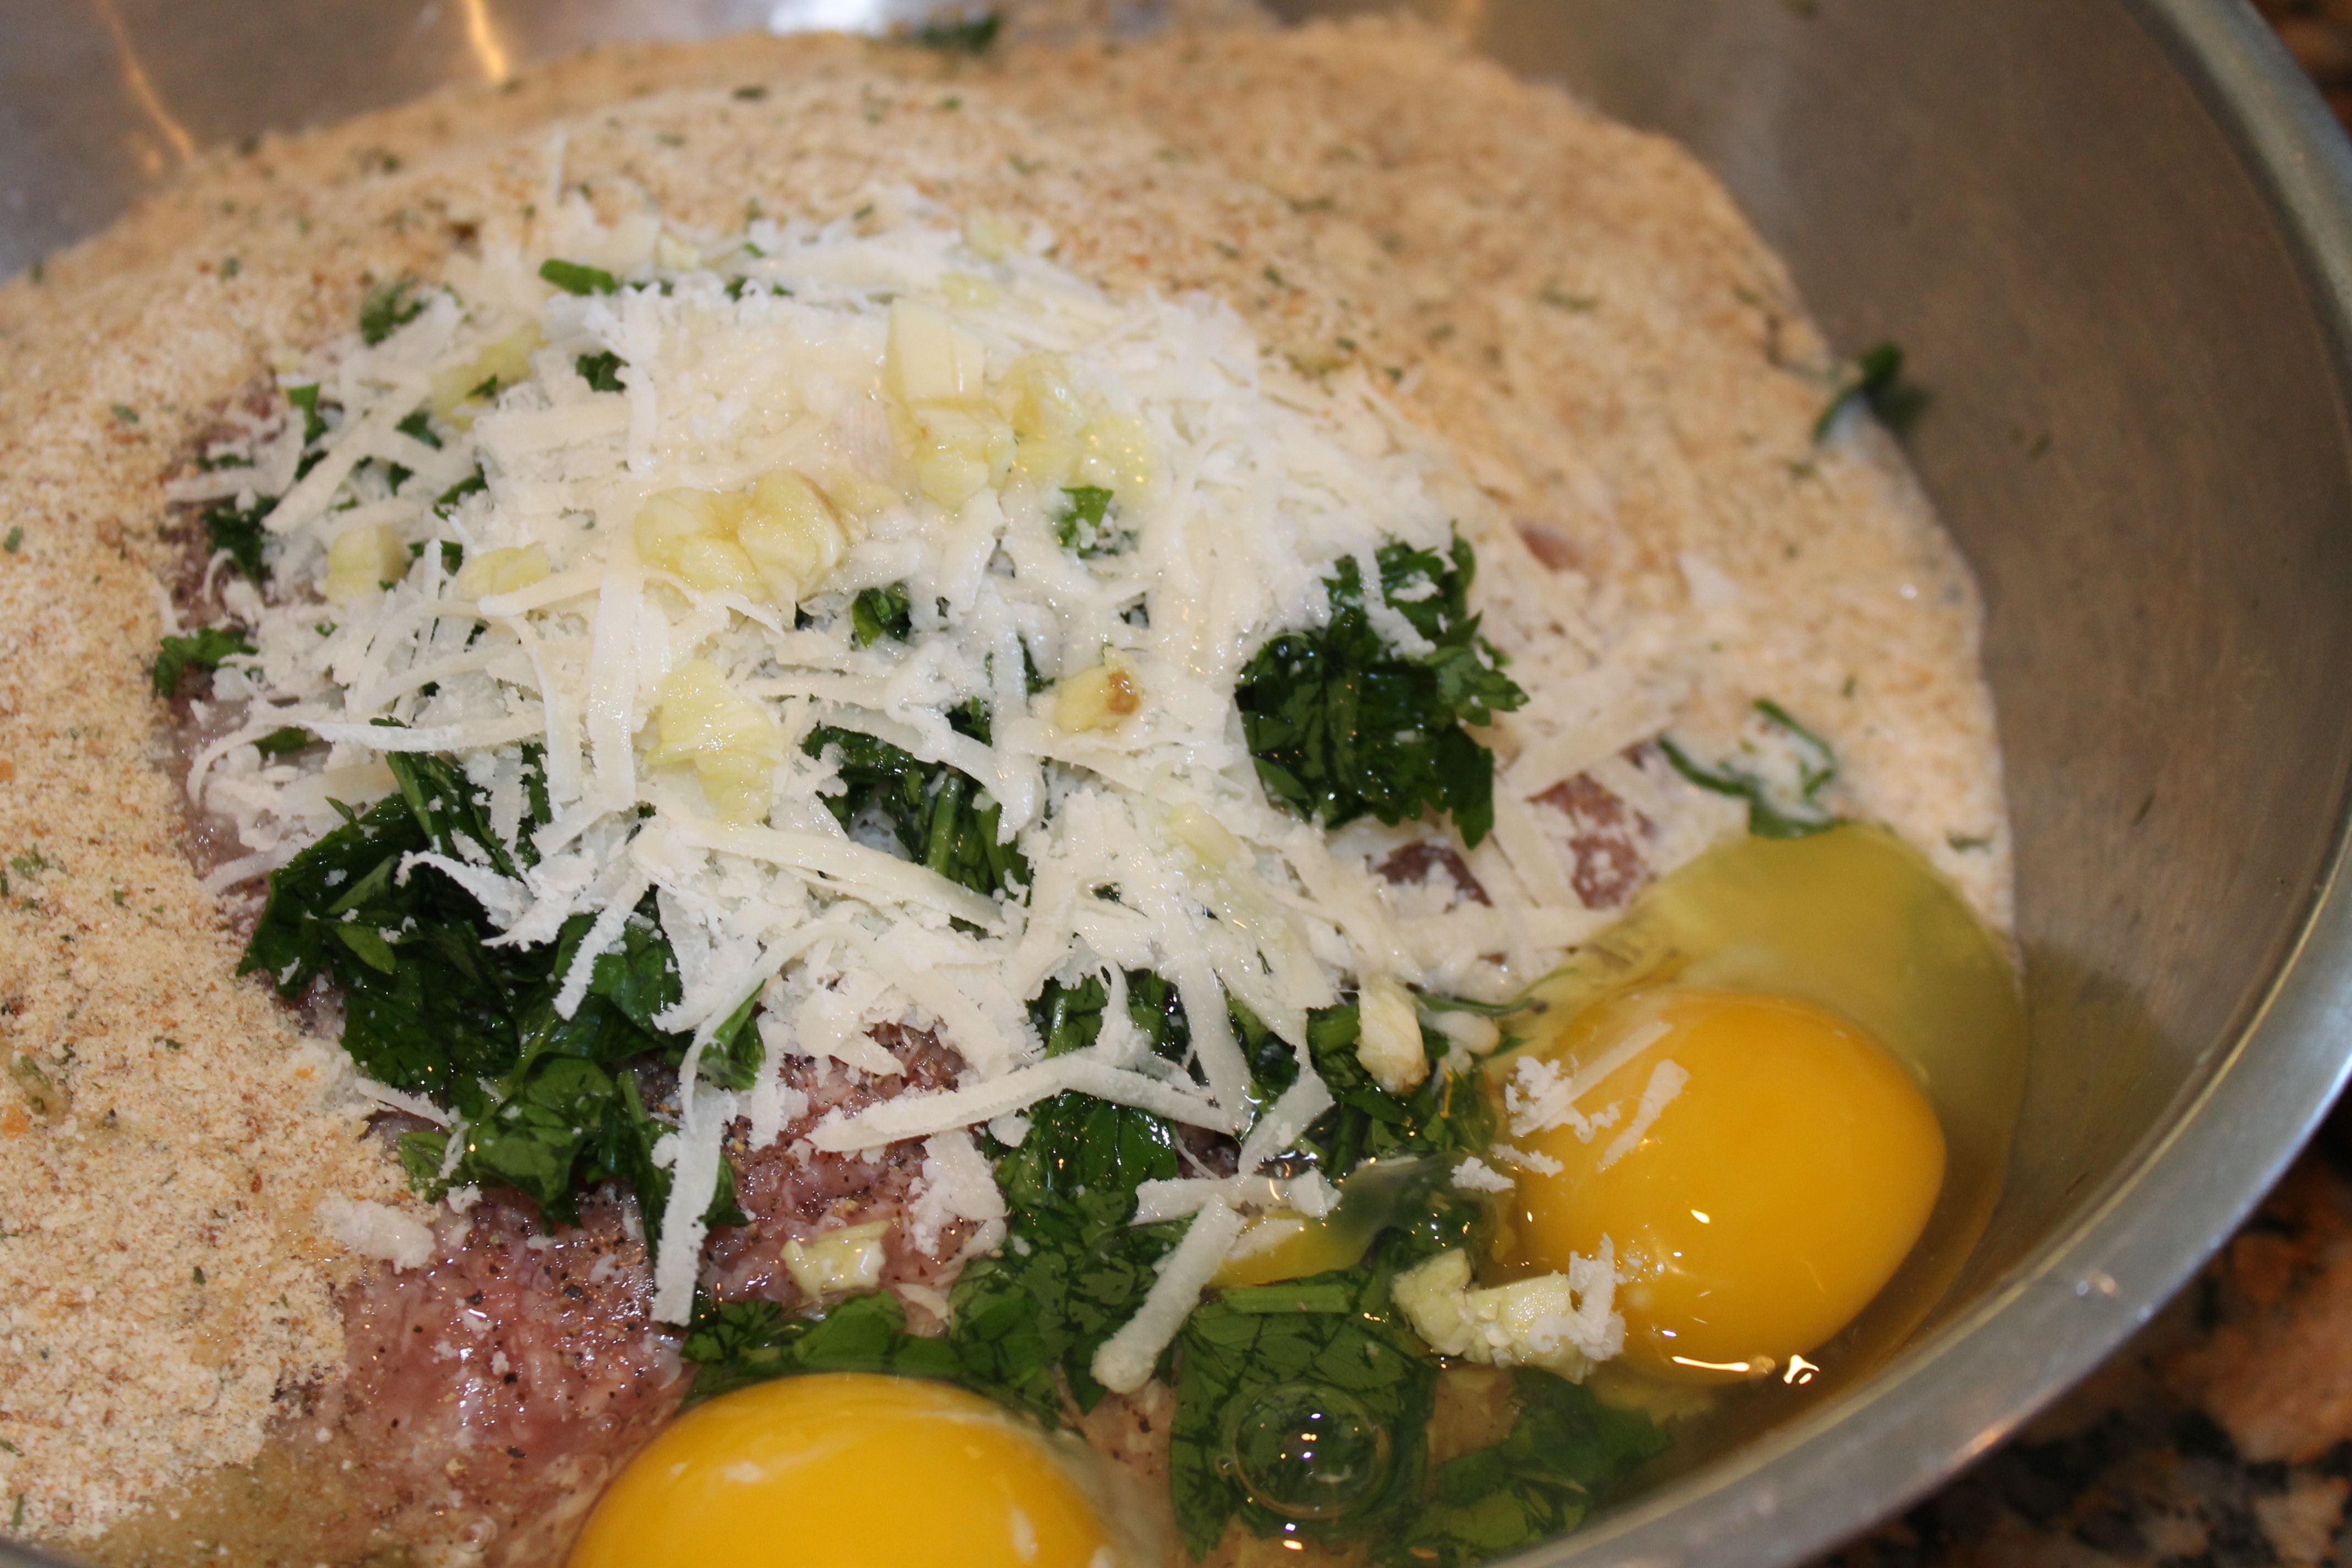
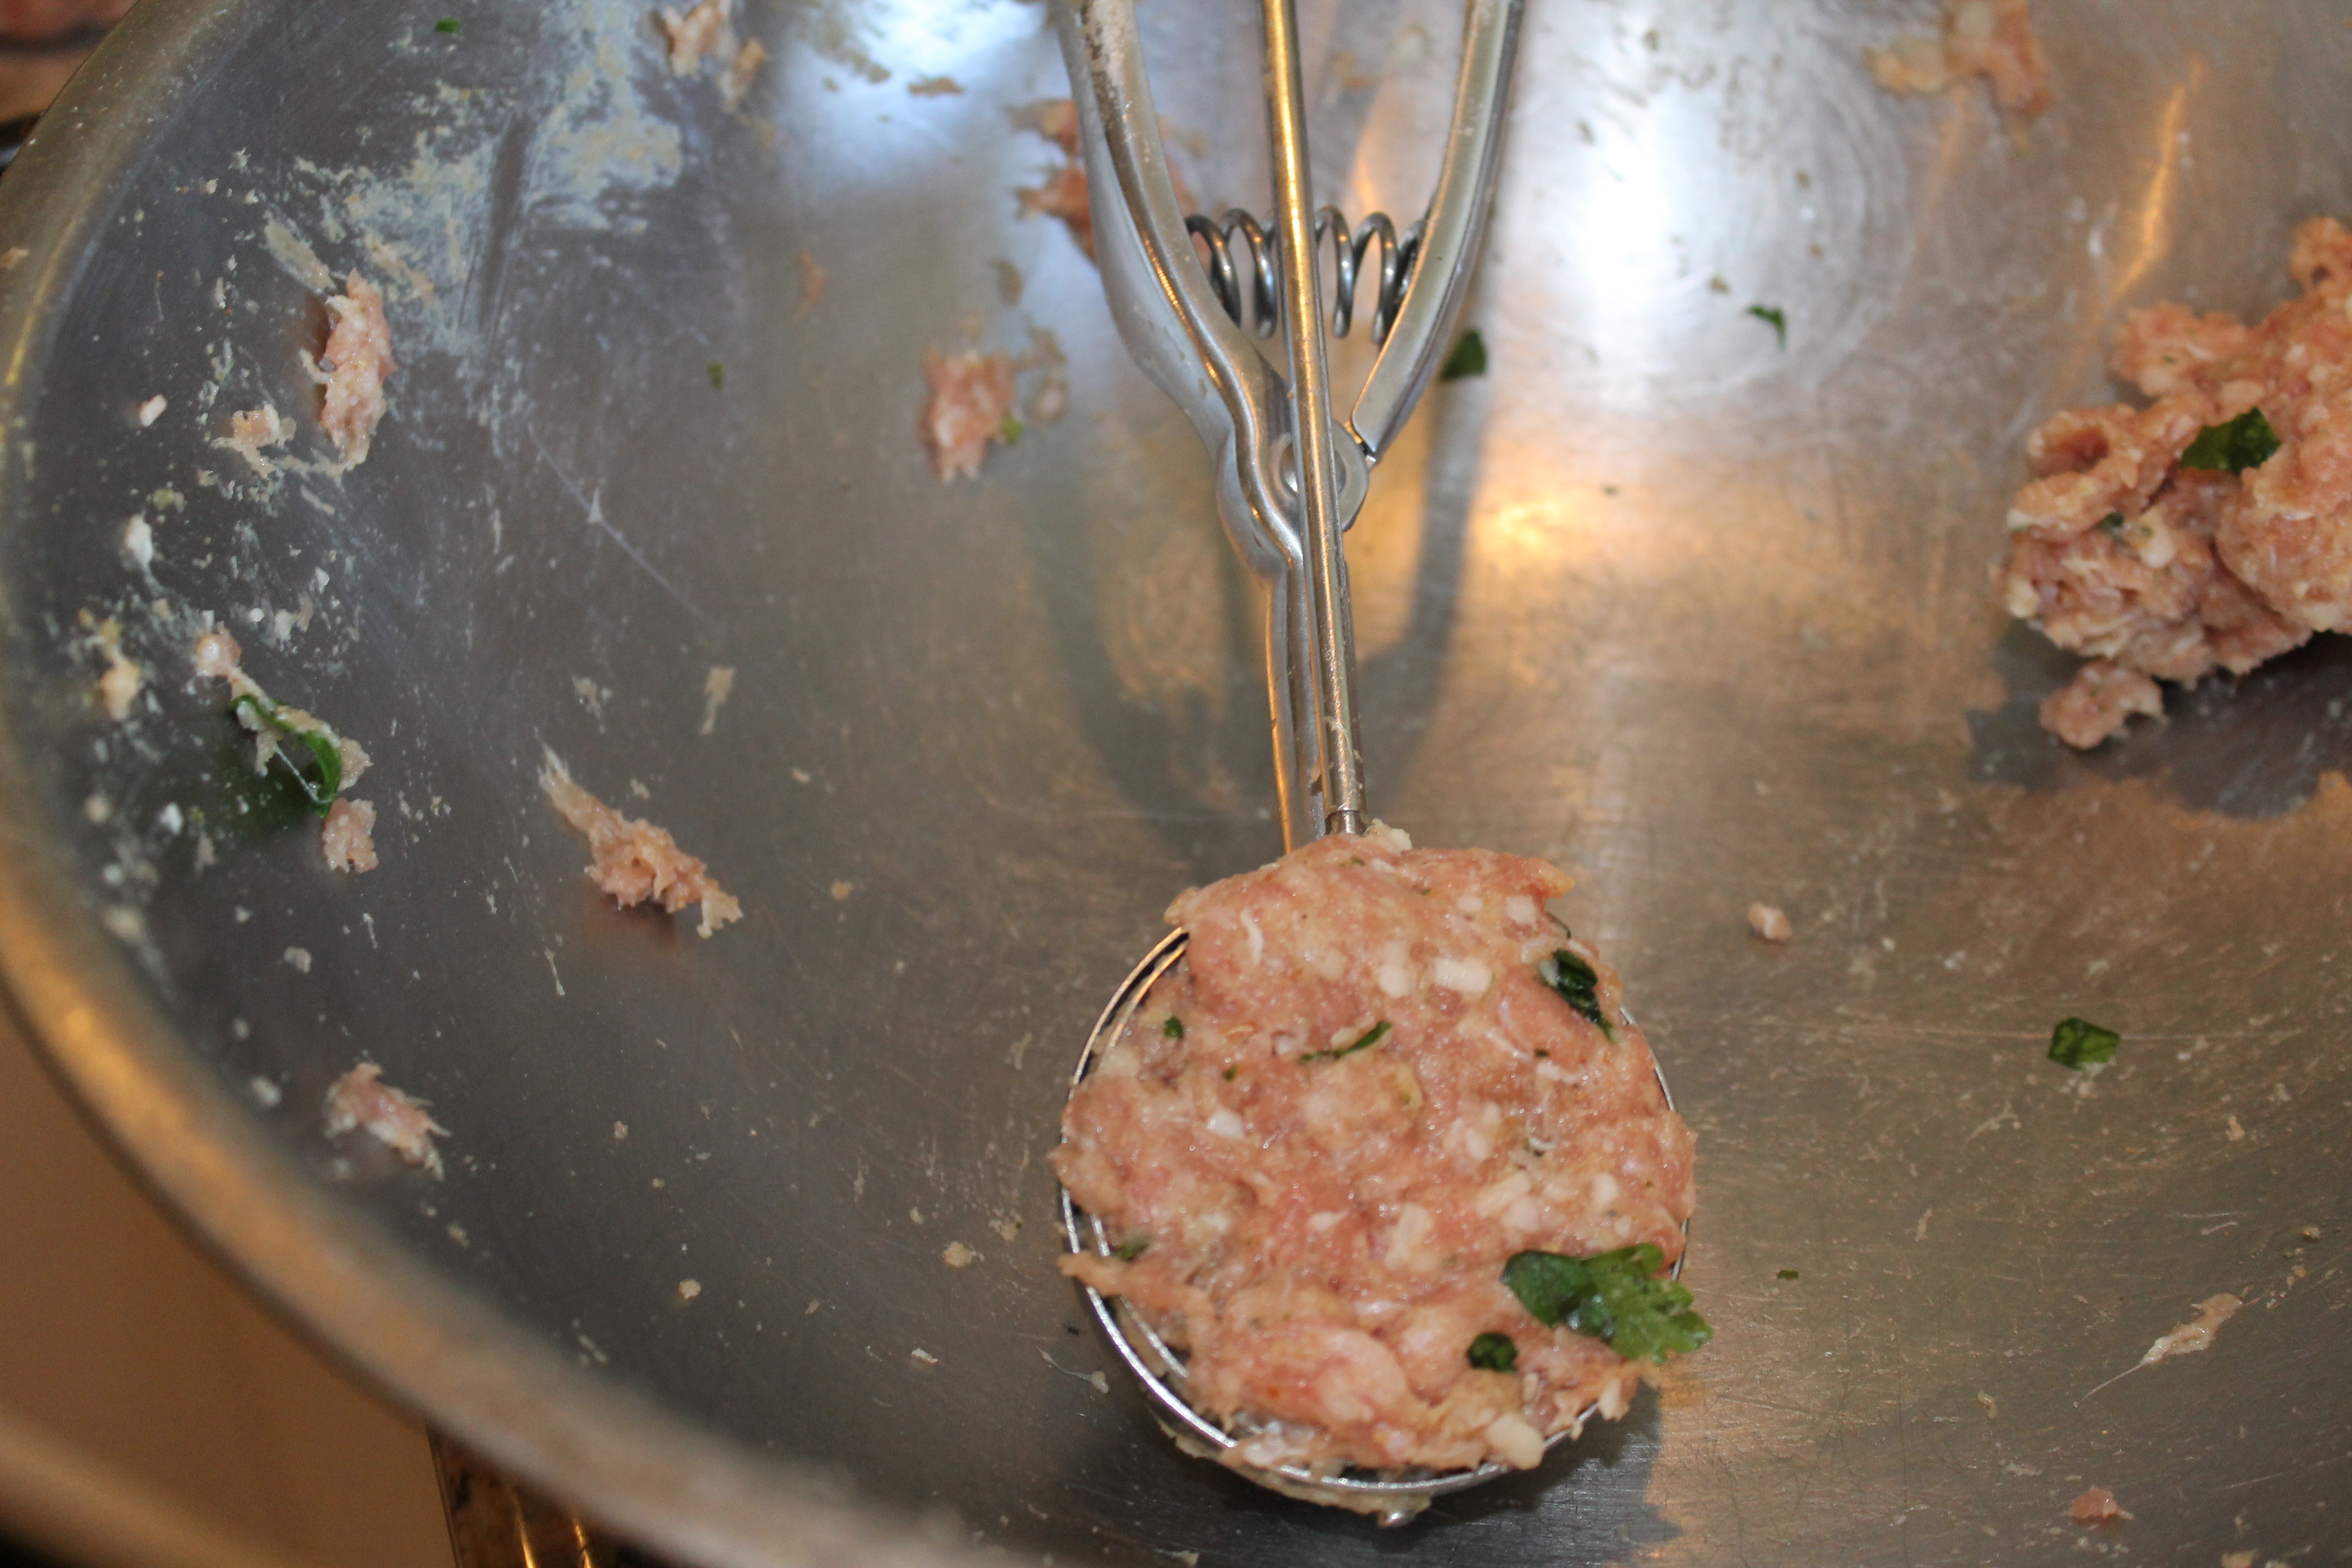
1) First, prepare the meatballs. In a large bowl, place the ground veal, breadcrumbs,  6 oz of grated cheese, milk, garlic, onion, seasonings, parsley and eggs. Combine all the ingredients and mix well with your hands. If you are a beginner cook, I suggest you use an ice cream scoop with handles to form your meatballs. Place them on a greased pan, and  bake in a 350 degree oven for 10 – 12 minutes. Turn them halfway through, to get color on both sides. Remove and set aside. You can certainly pan-fry them also, but it would take a little more work. There is no need to fully cook them as they will continue to cook in the sauce. Yields about 25-26 meatballs using the ice cream scoop.

Ingredients for the sauce: 

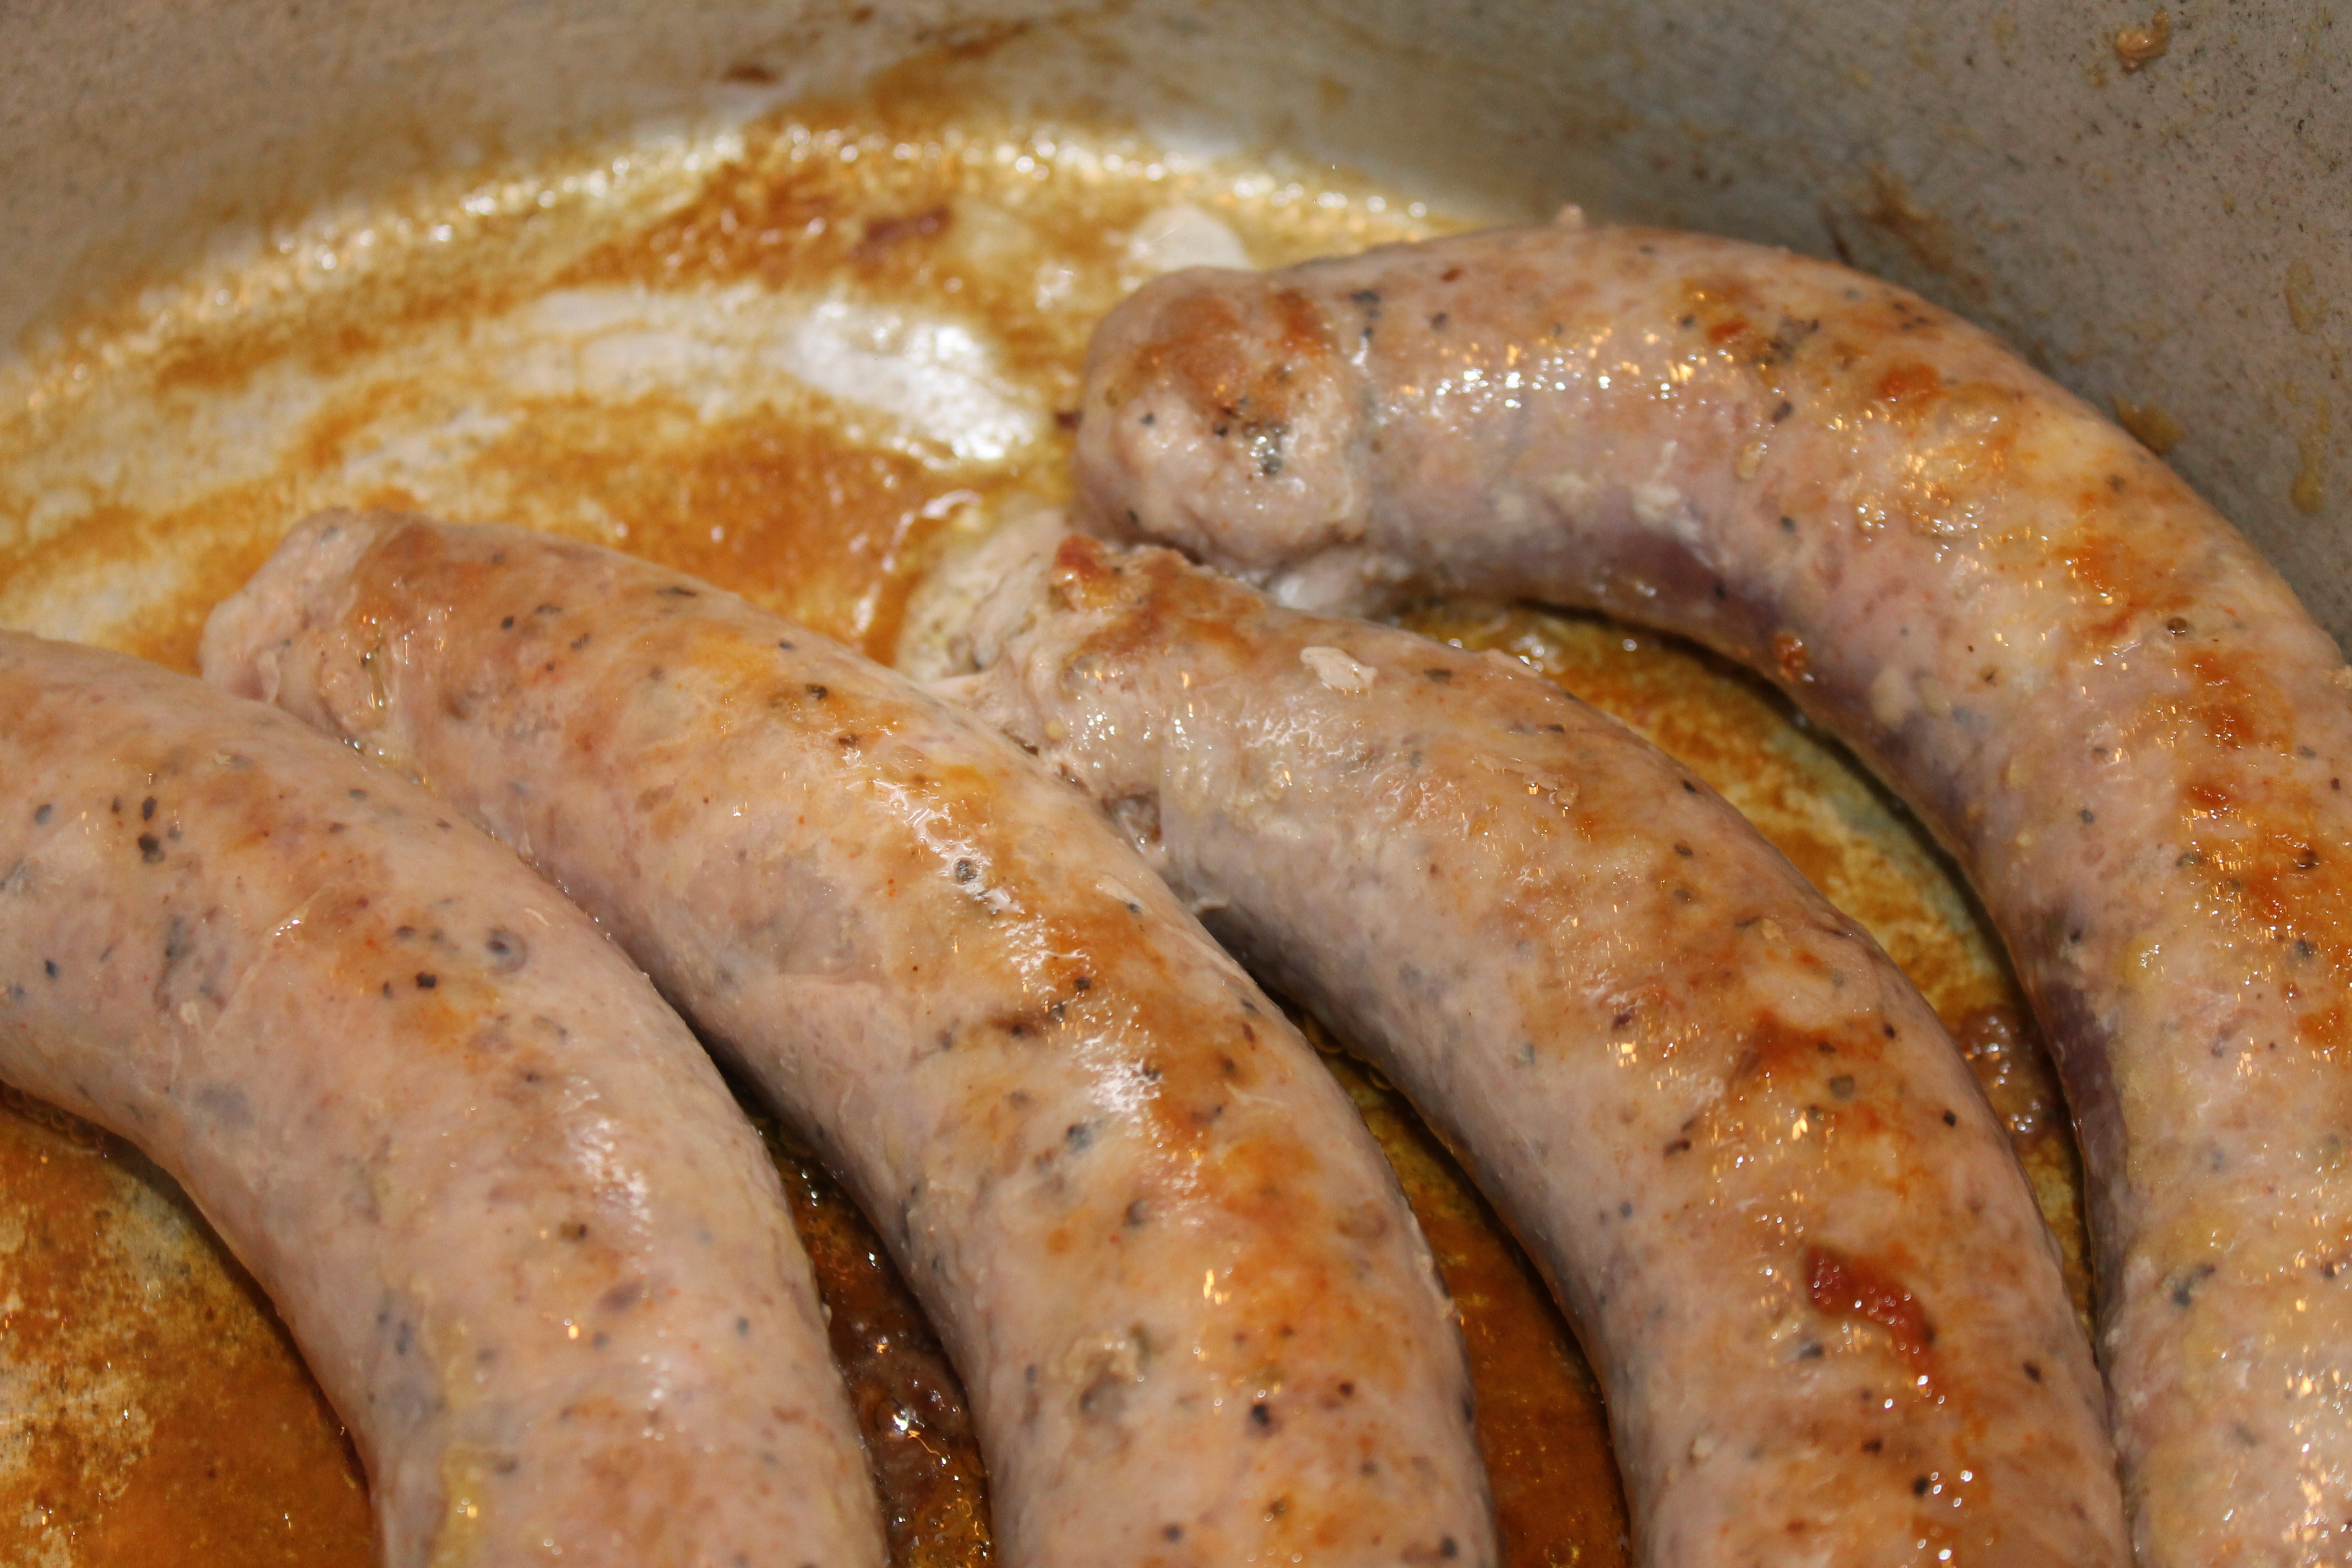
  •  4 lbs. sweet Italian sausage with fennel
  • 3 – 4 tbsp. olive oil
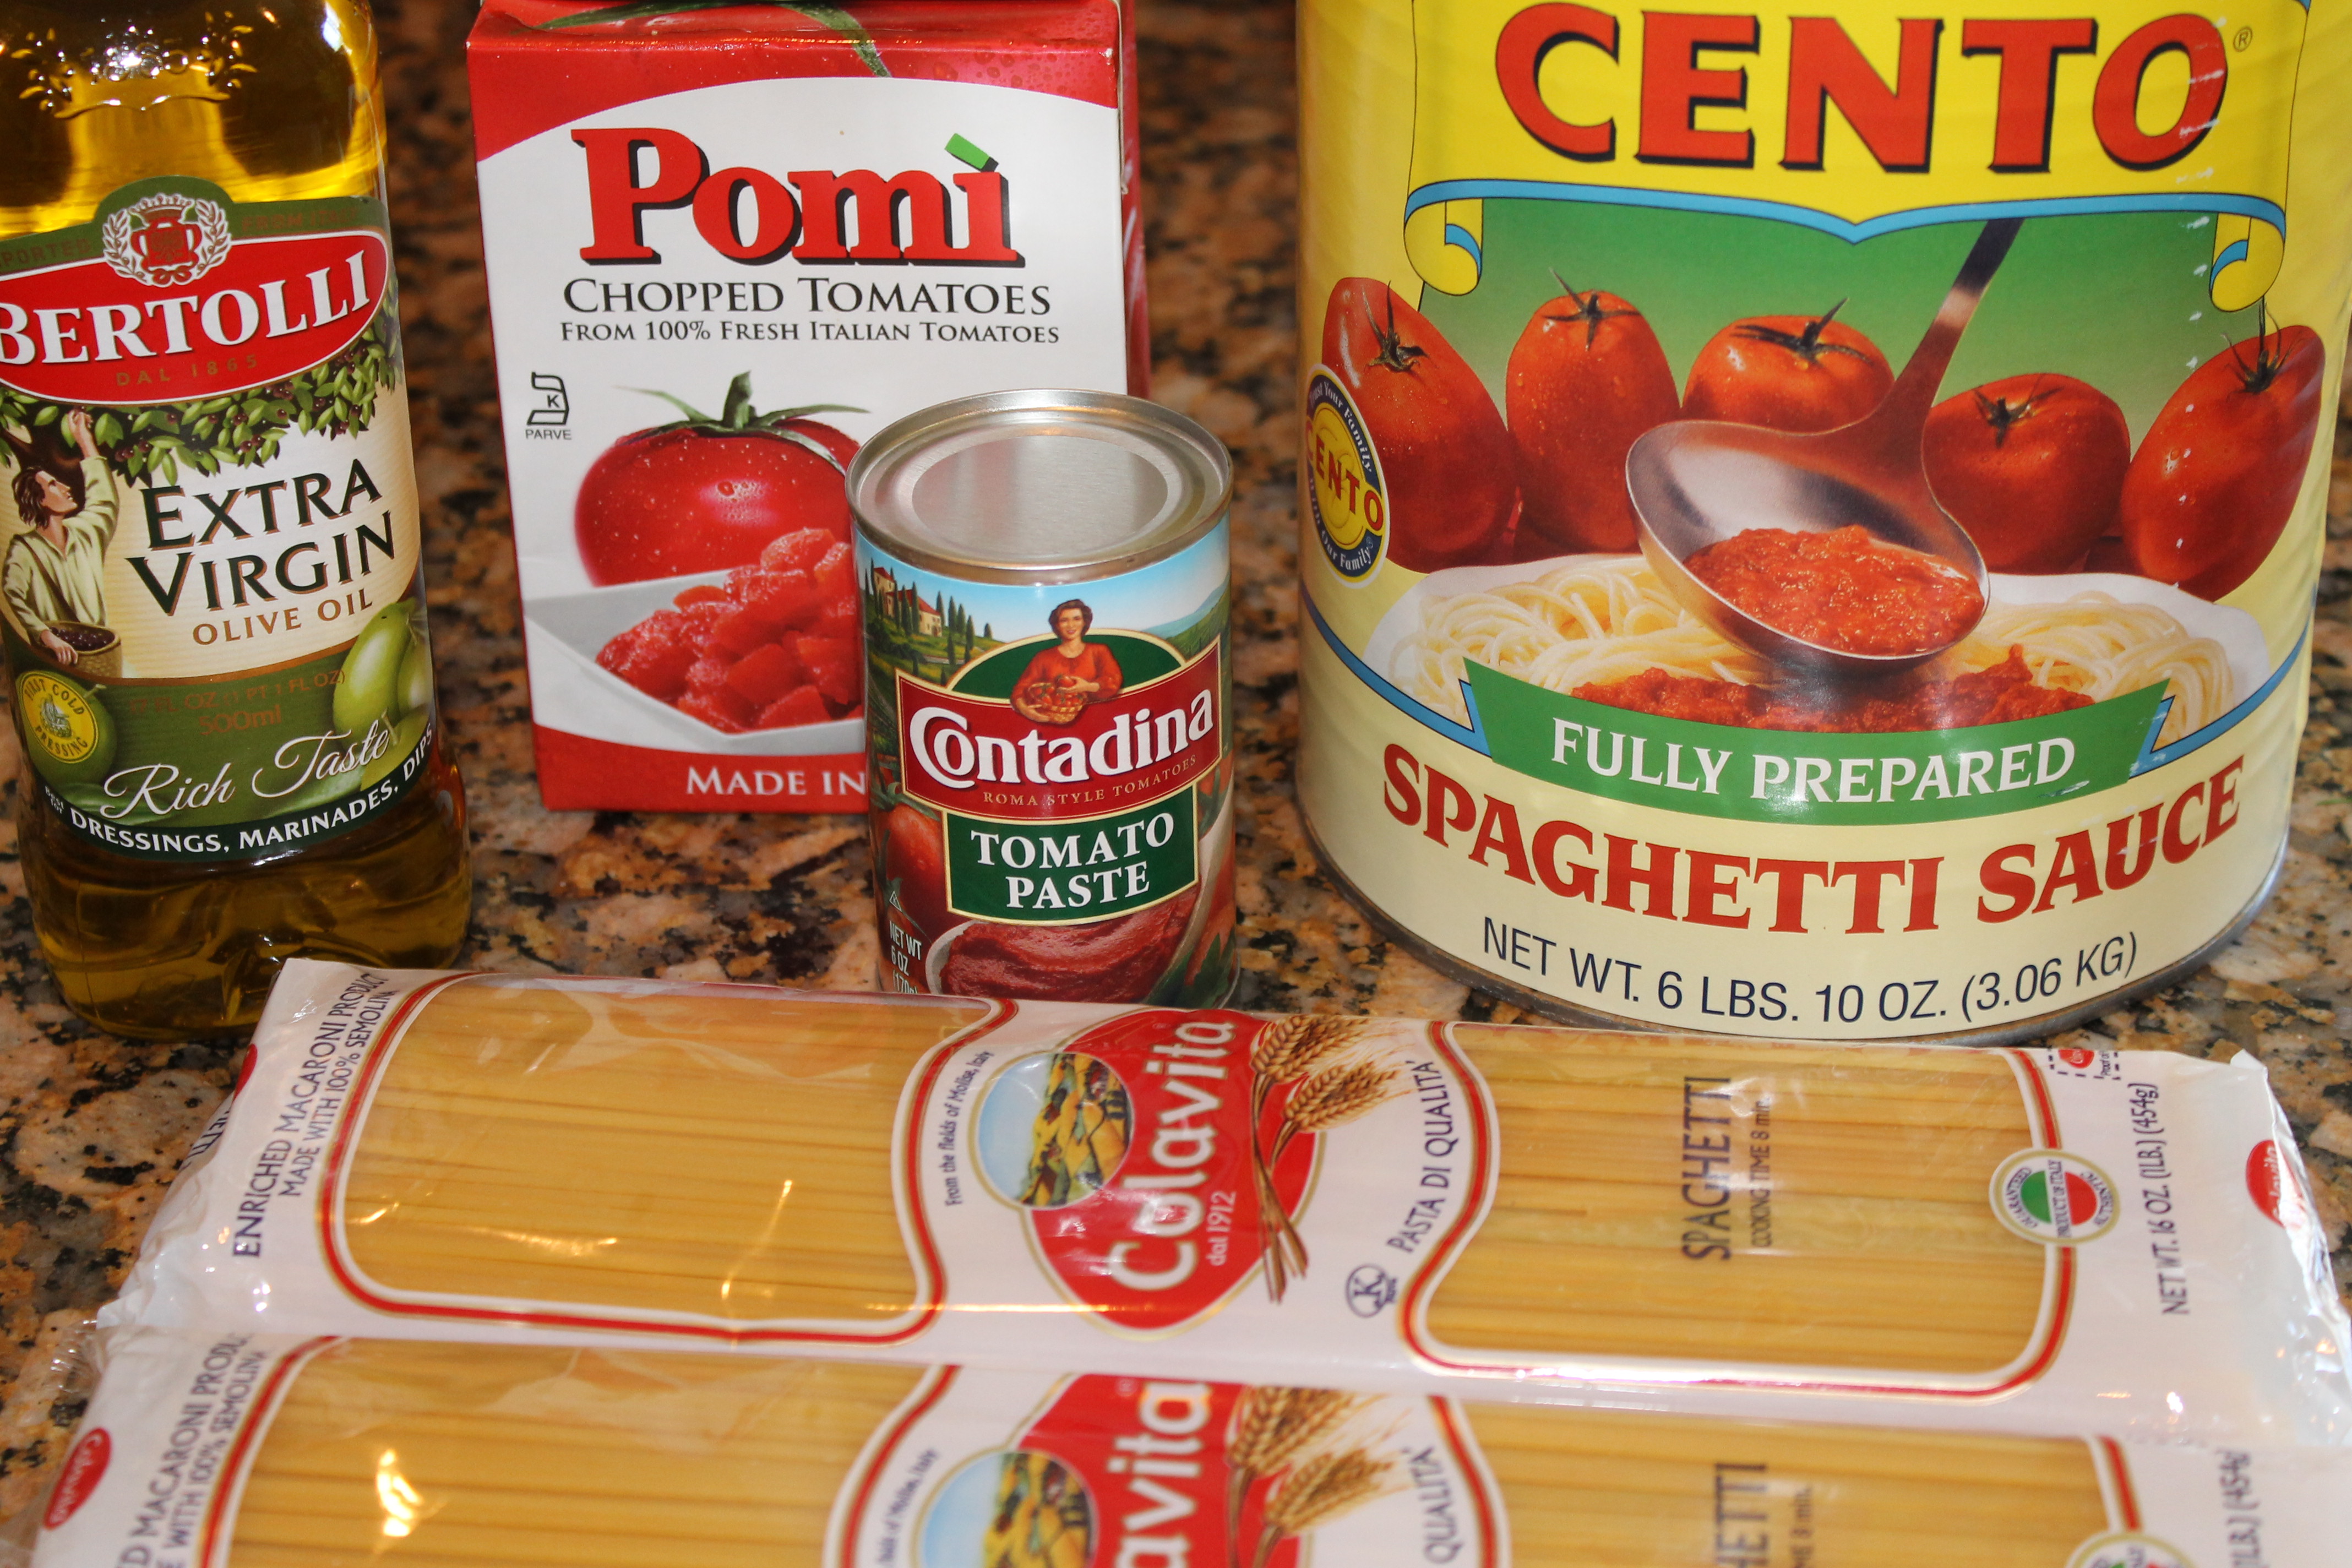
  • 1 container of Pomi chopped tomatoes, or other brand
  • 1 Cento, (size #10 can) fully prepared Spaghetti sauce *
  • 1 can tomato paste
  • Oregano, salt & pepper to taste
  • 1/4 – 1/2 cup of water
  • a pinch or two of sugar, optional

Preparation:

1) In a large pot, over med-high heat, add 2 tbsp. olive oil, and brown the sausages (whole)  on both sides.  You will do this in batches. Next, cut the sausage links in 3 pieces each. Set aside.

2) In the same pot, add more olive oil to brown the tomato paste. Cook and stir, until you get a nice caramelization, add the chopped tomatoes, the prepared sauce, the seasonings, sugar and the water. Bring to a boil, then lower the heat. Add the meatballs and the sausage in the sauce. Simmer covered for 2 – 2.5 hours, while stirring FREQUENTLY to avoid burning on the bottom of the pot.  Always taste for flavor and adjust seasoning as needed.

3) When sauce is nearly done, boil the water for the spaghetti and cook according to package directions.

Please note, I took a big chance by simmering the veal for so long, 10 more minutes I would have had a meat sauce. I strongly suggest you do a marinara sauce for them, which will take about 30 minute to 45 minutes. I have been in the kitchen for 25 years and love to experiment and take chances. (making a funny face)

*This is not my typical sauce, because I was cooking for a large crowd, it was convenient for me to use that large can of prepared sauce, which can be found at Italian specialty stores. I occasionally change the brand in the quest for a perfect sauce.

Recommended sauce for the Veal Meatballs (for about 12) 

Ingredients for Marinara sauce: 

  •  1 – 2  28 oz can crushed tomatoes, San Marzano is ideal as they are known for their sweetness, but they will cost you a bit more.
  • Salt and pepper to taste
  • Pepper flakes, optional
  • 2-3 basil leaves, chopped
  • 1/4 cup of Chardonnay, optional
  • 2 Tbsp. olive oil
  • 3 garlic cloves, chopped
  • 1/4 cup of water

Preparation:

Heat olive oil in med-sized pan, and saute’ the garlic. As soon, as they release their aromas, deglaze with wine, add tomatoes, water, seasonings and simmer covered for about 20-30 minutes. Stir occasionally. This marinara is enough for about 1 lb. of  pasta and 10 – 12 meatballs. (About half of the recipe above, more or less) PLEASE BEWARE, THE SAUCE WILL SPATTER, KEEP IT ON LOW AND USE A LID AS A SHIELD.

Now, that everything is cooked, it’s time to serve. I normally, place all the meal on the table, but in this case, I had everyone come up to me in the kitchen with their dishes, so I could have control  over the portions. They were very big eaters, and I wanted to make sure, I had enough for everyone.

With the holidays upon us, I hope,  you will try these meatballs with the marinara sauce. Not only, they will look festive, but I can assure you, they will be the talk of the town.

Happy Cooking and Happy Holidays From Gina’s Kitchen!

Wine pairing suggestion:  Chianti from the region of Tuscany. A luscious and widely popular wine made mostly from the red Sangiovese grapes.


Bites, Bubbly & Blogs

Since I am still fairly new at blogging, I decided to have a little get together in my kitchen with a couple of fellow (beginner) bloggers. We brainstormed and exchanged notes and ideas to help each other out. Angela will be blogging about food and wine and Barbara will be blogging about her amazing photography skills. I learned a lot from Angela’s organizational skills and computer knowledge, and Barbara taught me how to give my photographs some character and make them pop.  Their sites will be up and running soon, and I could not be more excited for them. From what I am seeing, bloggers help one another and are very supportive of each other.  That in itself is a big inspiration and motivates me to bring out my creative side.

GinaAngBarb

Needless to say, we had fun in my “Gina’s Kitchen” with small bites and bubbly to celebrate our new ventures. Of course, we spent nearly two hours, on and off trying to get some great food shots. Thank goodness, Barbara was there to guide us and give us some useful tips in food photography. This takes practice, and one can only get better with time and lots of experience. I made a lovely lump crab meat salad “sans mayo” since Angela does not care for it. I know some of you are frowning but not all of us are created equal and that’s what makes life so interesting.

It is a very simple recipe that anyone can whip up in no time

  • 1 – 8 ounce jar lump crab meat
    you can also use imitation crab meat which works
  • 2 stalks of celery, sliced
  • 1/2 red bell pepper, sliced
  • 1 small red onion, diced
  • 1 lemon
  • Salt and pepper to taste
  • 3 TBS olive oil

Degree of difficulty: Very easy
Serves 4-6

Preparation:

Lightly break up lump crab meat, if you are using imitation crab, you can shred it with your hands for a nice presentation. Combine all the ingredients at once and chilled for at least one hour. For added richness, you can add some mayonnaise and whatever spice you like.

lumpcrabmeat

I also served some delicious smoked salmon with sliced cucumbers. They were light and tasty but most of all, they paired beautifully with the bubbly.

foodblogging2014aug 137
Simple, yet sophisticated

foodblogging2014aug 133

Barbara brought some delicious hummus with veggies and Angela made a very healthy and scrumptious salad with field greens, avocados, corn, cherry tomatoes and sunflower sprouts.

foodblogging2014aug 138

It was a fun and productive day, especially in the company of two friends that I care for. I admire both for their lovely qualities and  generous hearts.

Stay tuned for more exciting blogs on food, wine and travels. Until next time, happy blogging from Gina’s Kitchen!


Clams Oreganata

Good evening all! I hope you are ready for some fun in Gina’s Kitchen. Tonight, I prepared Clams Oreganata and I am happy to share this recipe with you.  They were so delicious, my family devoured them one by one.

Serves: 4
Degree of difficulty: Easy – Medium

INGREDIENTS:

  • 25 little neck clams
  • 1/2 cup or so of seasoned breadcrumbs, (Progresso, Italian Style)
  • 1/2 cup chopped flat leaf parsley
  • 3/4 tsp Oregano
  • 2 tbsp extra virgin olive oil, (plain olive oil will do also)
  • more olive oil for drizzling
  • 1/4 tsp black pepper, optional
  • 1 lemon

PREPARATION:

In a colander, wash the clams thoroughly and place them on a flat baking tray. I will share with you a little trick to make it easier to open them. Preheat oven at 375 degrees and bake the clams for 3 minutes.  They will be open, just detach them one by one so each clam is on one shell. Do this while they are still on the tray. There will be some juice from the clams, leave it in there. Set aside.

IMG_0793

In a small bowl, mix the breadcrumbs, parsley, oregano, black pepper and olive oil. Sprinkle this mixture on top of all the clams and cover the tray as well.  Place in the broiler for 3 minutes and remove promptly. They should have a nice golden color to them.  Drizzle liberally more olive oil, and squeeze the lemon juice all over the clams. Voila! They make a fancy appetizer but do require a little work.  They are so worth the extra effort, your guests will be very satisfied.  If you choose to drink, I would pair it with a nice Chardonnay.

Bon Appetit!

From Gina’s Kitchen

IMG_0797


Gina’s Hummus

Good morning all! I am still very excited about blogging and hope more of you will join me on my new journey.   I have debated what to post, since I have a nice collection of recipes in my database. Today, I decided to share with you my popular Hummus recipe. It’s always a big hit at my gatherings and so easy to prepare.

Serves:  6-8
Degree of difficulty: Easy

INGREDIENTS:

  • 1 – 16 ounces can garbanzo beans drained and rinsed
  • 1/4 cup water
  • 2 garlic cloves
  • 1/4 tsp. salt, optional
  • black pepper to taste
  • 1 tbsp. Tahini (sesame paste) optional but highly recommended for richness
  • 2 tbsp. extra virgin olive oil plus more for drizzling
  • 1 lemon
  • Paprika
  • Olives and flat leaf parsley for garnish, optional
Very appealing to the eyes

Very appealing to the eyes


PREPARATION:

Combined all the ingredients (except for the  paprika and garnishes)  in a food processor or blender until it reaches a creamy texture. Add more water if needed. Place in a medium size bowl, garnish with olives, parsley, sprinkle the paprika and drizzle some olive oil on top. Chill in the refrigerator for at least an hour. Voila, you got yourself a crowd pleaser! Serve with Pita bread.

Bon Appetit

From Gina’s Kitchen